
Hi all! Welcome to another edition of our Yoga Basics Series!
If you are new to yoga, this is a great place to get more in-depth about proper positioning and to learn a bit more about what the poses can do for you! As you get more familiar with some of the more common Yoga poses, you can feel more confident in your practice either at home virtually, or in a class when studios reopen!
Today we are going to cover five great stretches for each body part! Guess what, you already learned a couple in Part 2! Downward Facing Dog is a great way to stretch out our calves, while the Standing Forward Bend stretches out our hamstrings. Feel free to check those out and add them to your list 😊
Of course, there are many ways to stretch out a muscle group so if you have trouble with those poses, there are other ways to stretch out your calves and hamstrings.
In fact, any pose you have pain or difficulty with, make sure you modify to your needs. If you are unsure how, let us know so we can help!
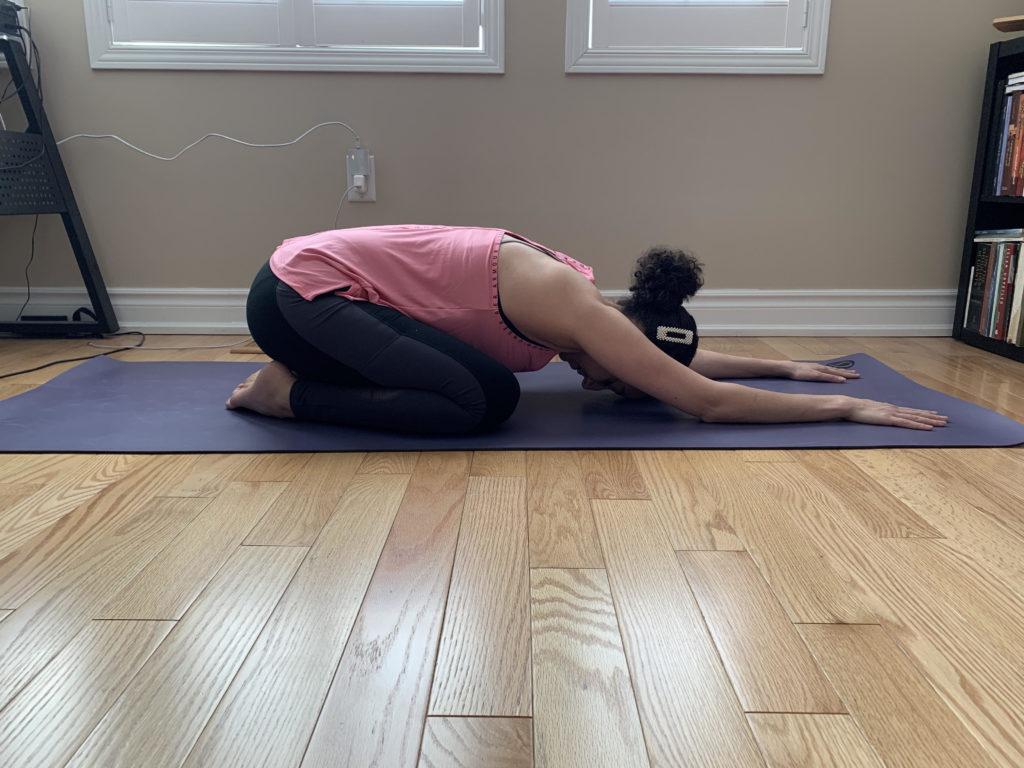
1. Balasana, Child’s Pose
Child’s Pose is a rest position between more challenging poses. It works on the mobility of your hips, ankles, and knees, while stretching the lower and sometimes mid back. It is often a position of relief for people with back pain, along with Knee To Chest stretches (except for discogenic pain!). It can be modified for sitting, where you simply reach the arms down between the legs and toward your ankles for a comfortable stretch.
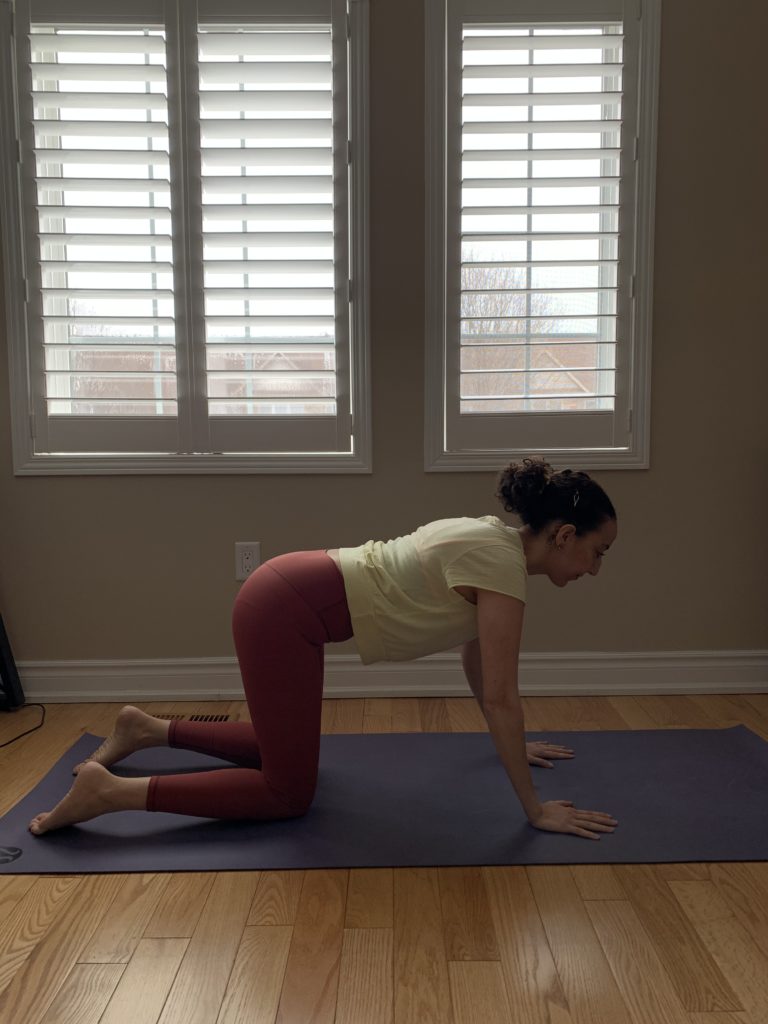
- Start in Table Top Pose (kneeling on hands and knees), then widen the knees and touch the big toes together
- Sit back onto your calves and heels
- On an exhale, slide your hands forward on the mat as you lower your upper body all the way down between the thighs
- Your forehead rests comfortably on the mat (chin slightly tucked in). If it’s more comfortable, you may have your head turned to the side instead.
- Press your hands away and your hips down toward the ground. Then, keeping your hips, you may relax the arms.
- Alternatively, you may bring your arms back to lay on either side of the torso, palms turned up to the ceiling, and shoulders relaxing down toward the ground
Rest here for 10 slow, deep breaths, or even longer.
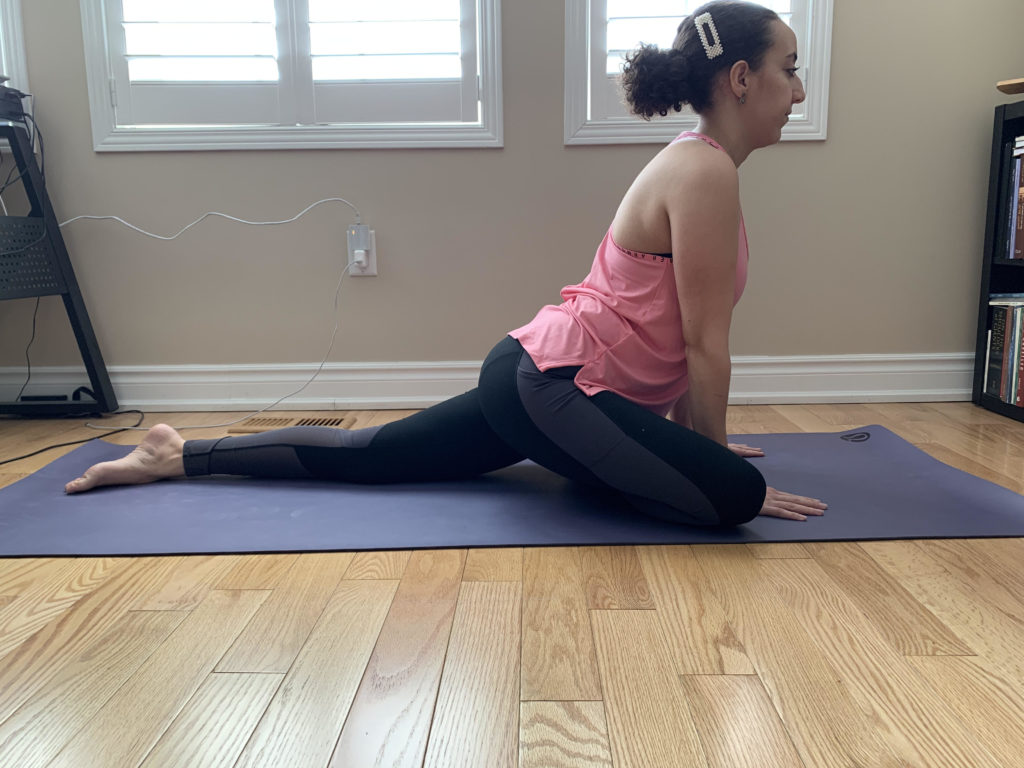
2. Eka Pada Rajakapotasana (variation of), Pigeon Pose
This is a popular pose.
Often referred to as a “hip opener”, Pigeon Pose is a two-for-one stretch!
It stretches the glute and piriformis muscles (and sometimes adductor muscles) on the one side (by externally rotating the hip), while providing a deep hip flexor (mainly the psoas muscle) stretch on the other side (by extending the hip).
- Start in Table Top, then bring right knee to just behind the right wrist and right foot close to the left wrist (or whatever angle of the lower leg is most comfortable)
- Slide back the left leg with the knee straightened, making sure your front thigh is square with the mat and your pelvis is sitting evenly (not tilting more to one side). If your right hip doesn’t rest easily on the ground and wants to draw the pelvis down to the side, you can place a rolled towel underneath it for support.
- Then, as you inhale, pushing up through the hands, straighten out the back, open up the chest, and gaze forward
- Adjust as needed so that you feel a comfortable stretch through your right gluts (and potentially inner thigh) and left hip flexors
- Preferably, the left top of the foot is resting on the mat, but you may keep the toes tucked under if it feels more comfortable. You may stay here for the remainder of the stretch…
- For a deeper glut stretch, try bringing the right foot closer to the back of the left wrist, then, walk your hands slowly forward until you can lower your body down toward the ground
- Rest your forearms and forehead on the mat, and see if you can relax comfortably into the stretch, still keeping the pelvis even. If you feel pain or discomfort anywhere, especially your knees, back off the stretch and modify the position as needed.
- To come out of the pose, walk the hands back to an upright torso, tuck in the left toes and lift the left knee and thigh off the mat. At the same time, bring right foot back behind the right knee. Then, bend the left knee to kneel beside the right.
Hold position for 5-10 breaths, then switch sides. If this stretch does not feel good, an alternative way of stretching the gluts and piriformis is Thread The Needle (the piriformis version, not the shoulder version!).
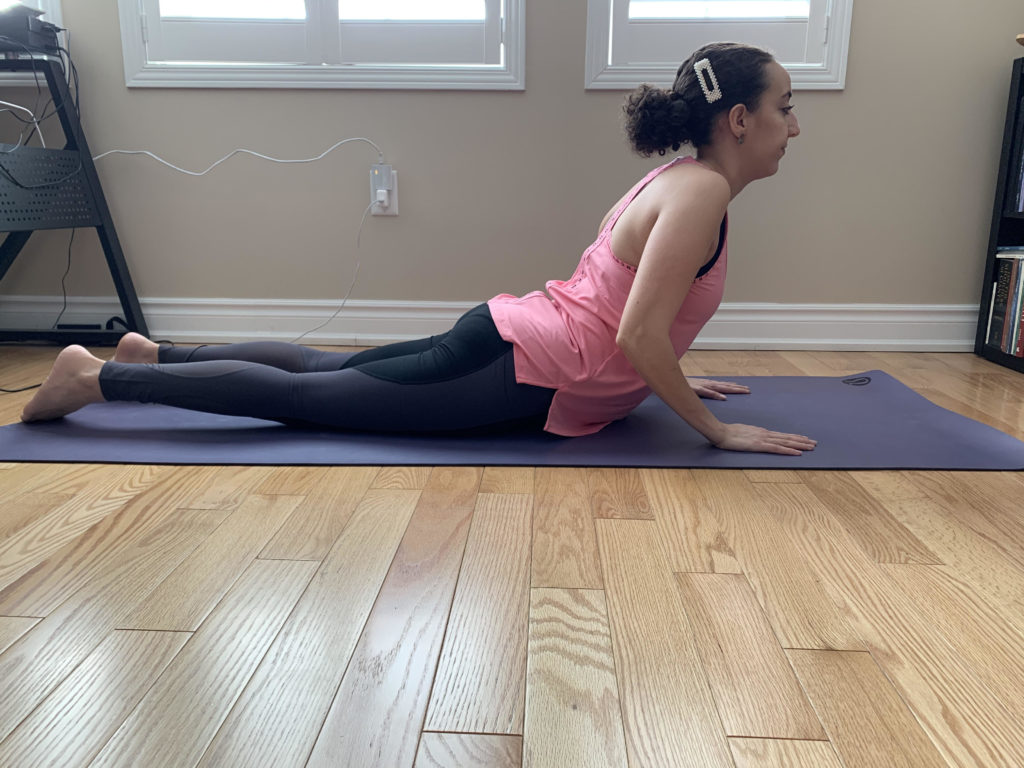
3. Bhujangasana, Cobra Pose
Cobra Pose is a multipurpose stretch.
It stretches everything that normally gets contracted during long hours at the computer: the muscles of the front of the neck, the chest and abdominals, and it even extends the low back if you allow the pelvis to relax and rest on the ground while pushing upward through the hands.
For people with discogenic pain, this is much more effective than rounding postures such as Child’s Pose or Knee to Chest. Discogenic pain is pain that is reproached with sitting or forward flexion activities.
- Start in Table Top, then lie down onto your stomach, face down, legs straight and tops of feet on the ground
- Place hands on the ground, underneath your shoulders, keeping the bent elbows close to your body
- On an inhale, slowly begin straightening out the arms as you push up through your hands to lift your chest off the ground
- Keep thighs and pelvis in contact with the ground without engaging the gluts or abdominals, keeping the lower body relaxed. When your pelvis wants to start to rise, that’s when you stop rising any further.
- Bring shoulder blades together, opening up the chest, and gaze upward
Hold position for 5 slow, deep breaths, then lower yourself gently back down on an exhale. (For discogenic pain, it might be best to only do one breath at a time and repeat multiple times, usually ten repetitions.)
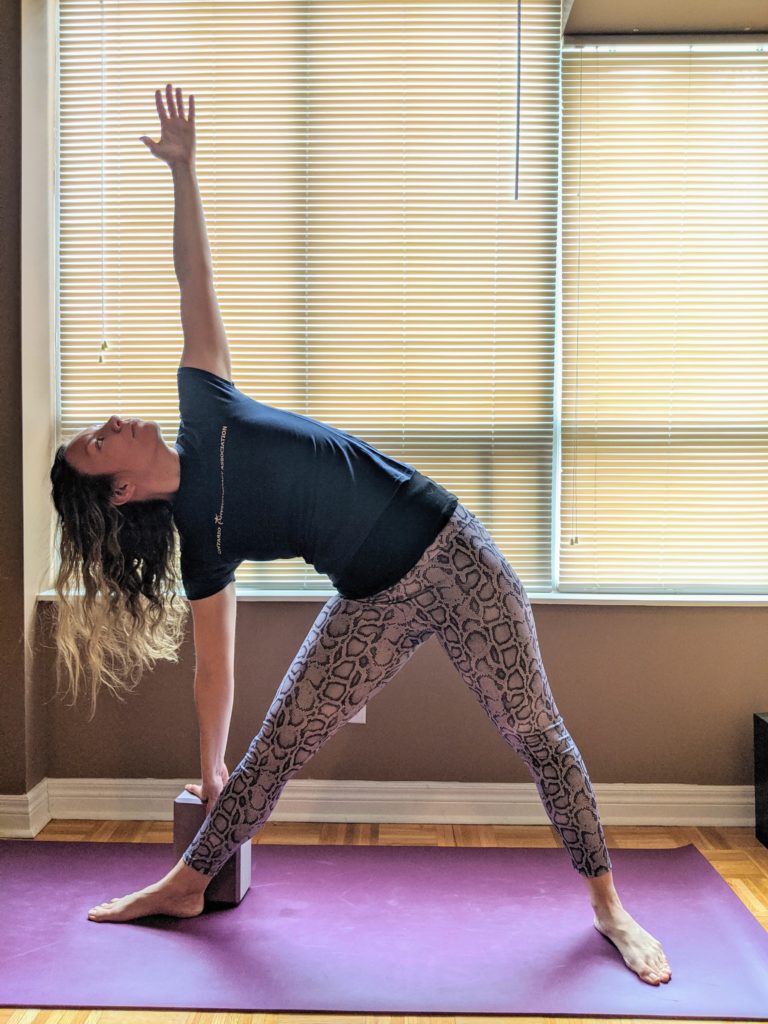
4. Utthita Trikonasana, Extended Triangle Pose
This pose builds both strength and balance, but also offers another multipurpose stretch: stretching hamstrings, inner thigh (groin muscles), and one side of the torso.
Depending on correct positioning, it can open up the chest and shoulders as well. Even if you are not that flexible, the use of block support, or modified lower hand positioning can still allow for a great stretch!
- Start in Warrior II (described in Yoga Basics, Part 2), or with feet 3-4 feet apart, the front (right) foot pointing forward while the back (left) foot is perpendicular to it, pointing out to the side. Heels should be in line with each other.
- Arms are lifted to be parallel to the ground, right arm over the right leg, and the left over the left leg.
- Straighten out the front (right) knee
- Then, on an exhale, with a straight back, bend the right side of your torso over the plane of the right leg, by hinging at the hip and not the back. Rotate the torso so that you’re facing toward the left.
- Even out your weight distribution by pushing firmly into the mat with the back (left) foot
- Reach your right hand down toward the ground (behind the right ankle), or to a block support, the ankle, or shin
- Reach the left arm up to the sky so that it’s directly over the right arm and forming a straight line up from the ground
- Open up the chest more to the left side and gaze either forward (if you have neck pain, stay here), or upward toward the left thumb
- Make sure that your legs, arms, and torso are all in the same plane (or line) with each other
Hold position for 5 slow, deep breaths, then come back up on an inhale. Repeat on other side.
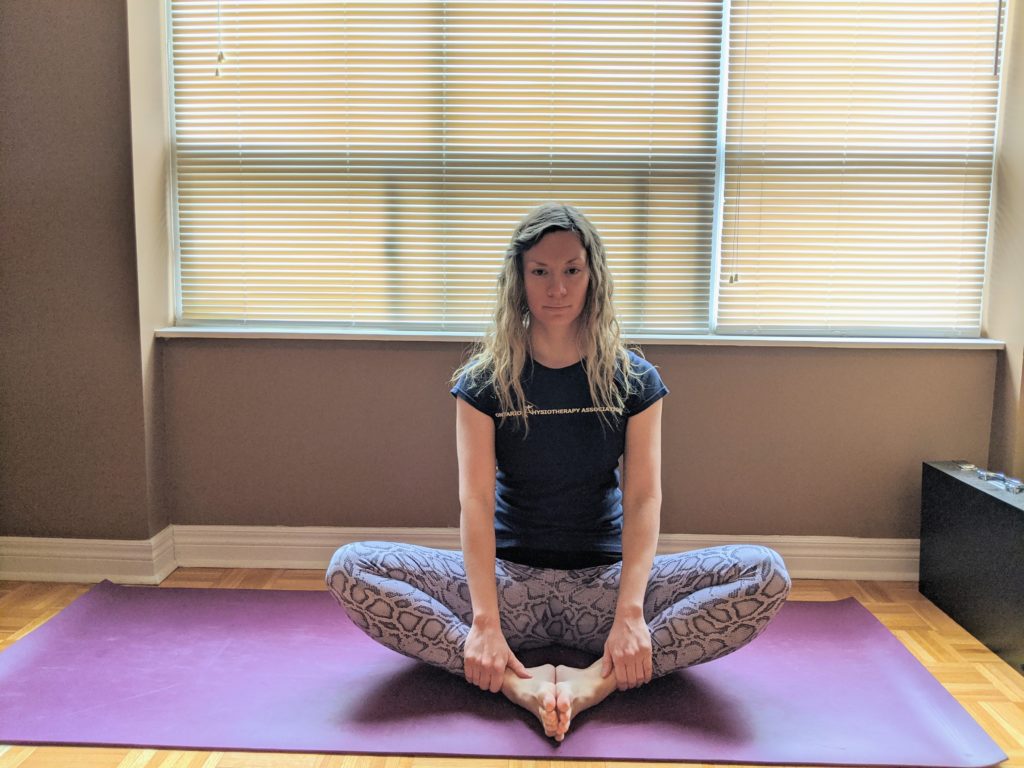
5. Baddha Konasana, Bound Angle or Butterfly Pose
Butterfly Pose is a grounding and relaxation pose, often placed at the end of a yoga practice in order to allow for reflection. It can also be a great way to start a practice. Butterfly provides a great stretch for the inner thigh and groin muscles (the adductors). However, if either knee or sciatic pain is bothered in this position, feel free to modify or skip the pose!
- Start in sitting, legs and back straight, hands on the ground
- On an exhale, bend the knees and bring the heels in toward the pelvis
- Touch the soles of the feet together and allow the knees to drop to the ground
- With your hands, hold onto the big toes, ankles or shins
- Bring the heels as close to the pelvis as is comfortable
- Pull shoulder-blades gently back and down, elongate the spine as you sit up tall, and keep the pelvis neutral instead of allowing the tailbone to tuck under
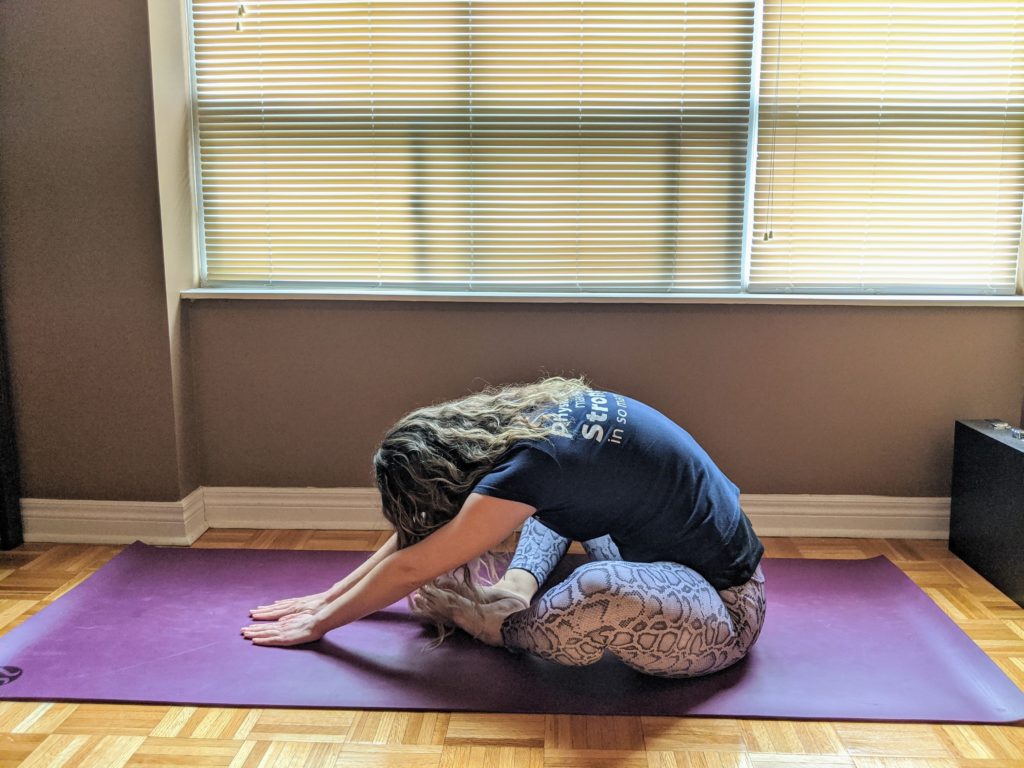
- You may stay in this position, or for further stretch, you can go into the Forward Bend Variation. After an inhale to lengthen the spine while sitting upright, exhale and fold your body over your feet, reaching arms forward, gaze toward the ground
- Try to keep the low back fairly straight, hinging more from the hips. You may need to move the heels further away from the pelvis to allow for an easier forward fold.
Hold position for 1-3 minutes. When coming out of the position, use your hands to push your knees up and back together, as if closing a book.
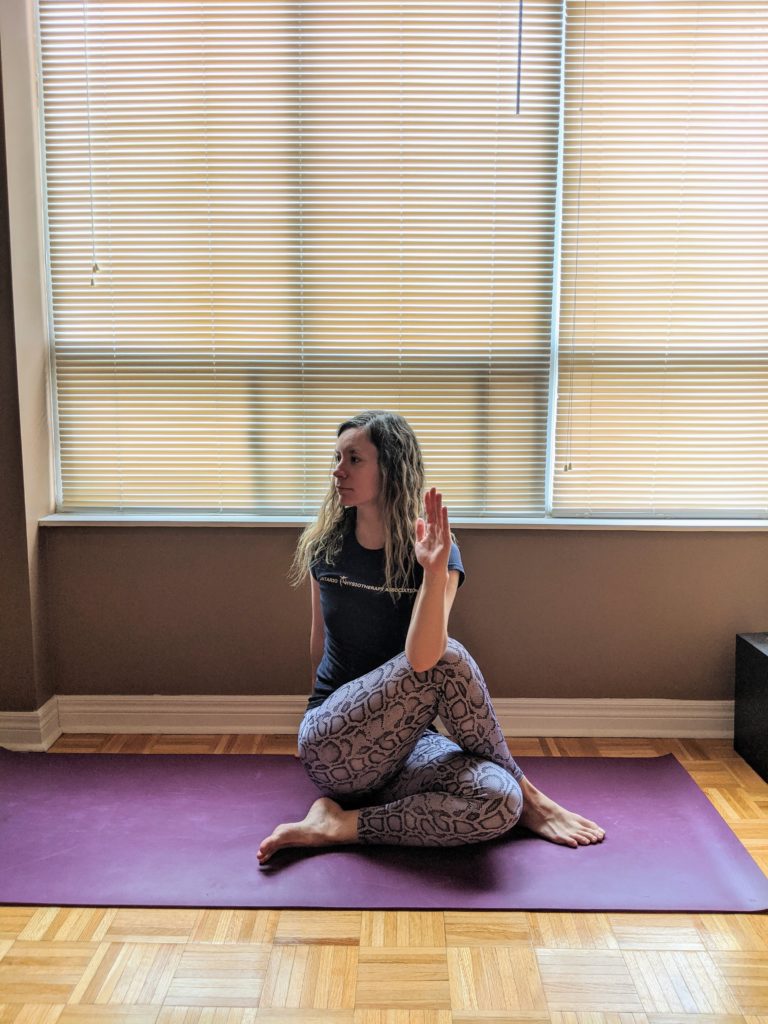
**Bonus Pose: Ardha Matsyendrasana, Half Lord of the Fishes
This is a twist stretch that many people are already familiar with. It’s mainly a side and back stretch but can also stretch your gluts.
- Begin seated with legs straight out in front of you (or in Butterfly Pose, then close the knees together and place feet on floor)
- Bend your knees so that feet are on the floor
- Then, slide the right foot under the left leg and toward the left hip, with the right foot on the ground
- Place the left foot on the outside of the right knee and closer to the right hip, knee still pointing toward the ceiling
- On an exhale, twist your torso toward the left side, with your left hand resting just behind the left buttocks and right elbow or upper arm resting on the outside of the left thigh, close to the knee
- Inhale to elongate the spine, sitting tall in your twist and relaxing the shoulders
- Then, on an exhale, twist a bit more, bringing your abdominals closer to the left inner thigh
- Repeat this process by lifting up the sternum and lengthening the spine slightly more with each inhalation, while twisting a little deeper with each exhalation
Rest in this position for 5 breaths, then, on an exhale, slowly return to sitting with knees bent and feet on the ground. Switch sides.
Congratulations! You’ve completed another round of Yoga Basics. Practice these stretches based on your comfort level and let us know if you need help with your practice! 😊
As Physiotherapists we are here to help you with pain, strength and movement.
If you are having difficulty with the poses and postures our role is to help you make them more accessible! While our physical location is in Oakville Ontario, we are currently (and in the future!) treating virtually all over Ontario using secure telehealth platforms. Most insurance companies now cover physiotherapy that is conducted virtually or via telehealth.
It’s like a FaceTime or video chat!
Contact us for more information on how we can you reach your goals!