Welcome back to the Yoga Series!
This series for anyone who is a beginner at yoga and would like to learn more about the individual poses so they can build the foundation for their practice…
Today we will talk about yoga poses that focus on building your core strength (check out Part 2 for some Common Poses that are used as starters in today’s post). If you are new to yoga and thought it’s all about stretching, guess again!
These core poses will definitely challenge you, but that’s okay! You don’t have to be super flexible and you don’t have to be super strong to start because it’s through a regular practice that you improve 😊
1. Dandayamana Bharmanasana, Balancing Table Pose
Balancing Table Pose, also dubbed the Bird-Dog, works your core, glutes, and back stabilizer muscles.
- Start in Table Top, hands under shoulders and knees under hips (and placed hip-width apart)
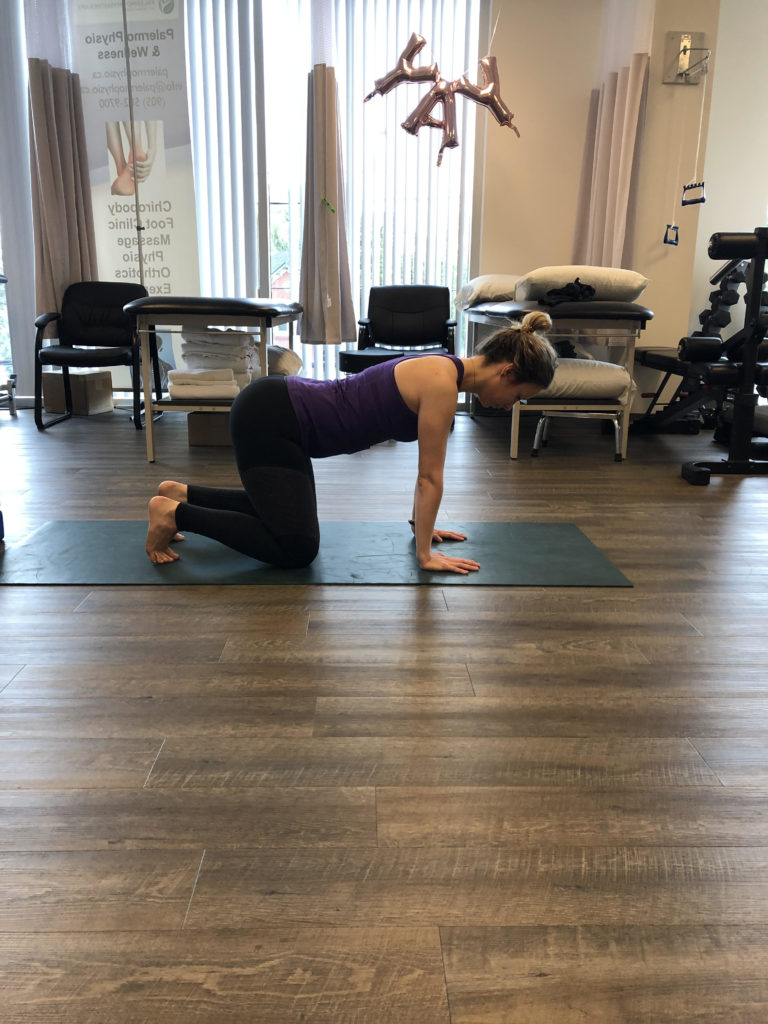
- The whole spine is parallel to the ground, head is in line with the body, and the gaze is toward the ground as well
- Gently pull belly-button in 2 inches toward the spine
- Then, on an inhale, reach one arm forward so that it is parallel with the ground
- Then, without arching the low back or tilting the pelvis, straighten out the opposite leg so that it is parallel to the ground and in line with the torso
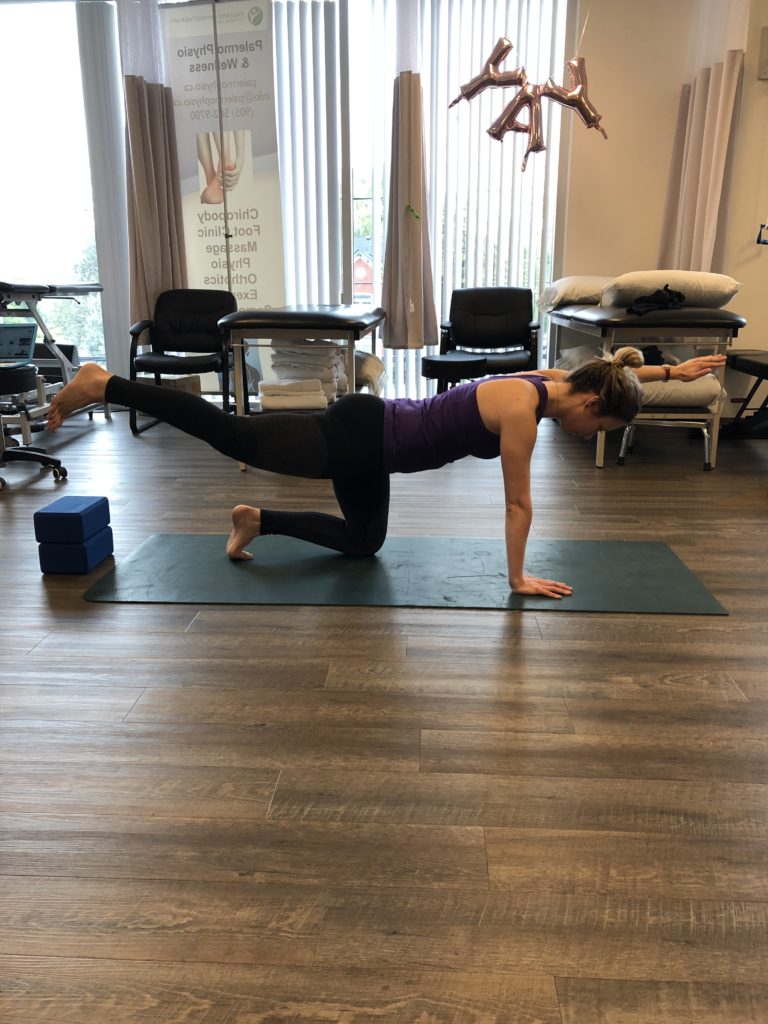
Hold position for 5 breaths, continuing to pull the belly-button inward. Then, slowly lower arm and leg down while keeping the whole torso in a neutral position. Repeat on opposite side. If you find having both arm and leg up is too challenging for the balance, perform only with the arm, or only with the leg, alternating between both sides.
2. Kumbhakasana (AKA Phalakasana), High Plank Pose
High plank is a great core exercise but it does put a lot of weight-bearing through the wrists and shoulders. If this is uncomfortable, try it on your forearms instead (Dolphin Plank). In Dolphin Plank, keep the elbows under the shoulders. You also have the option of either a straight torso, or hips higher in the air to make holding the pose easier.
- Start in Downward Facing Dog (described in Part 2!) and on an inhale, lower your hips as you shift your torso forward
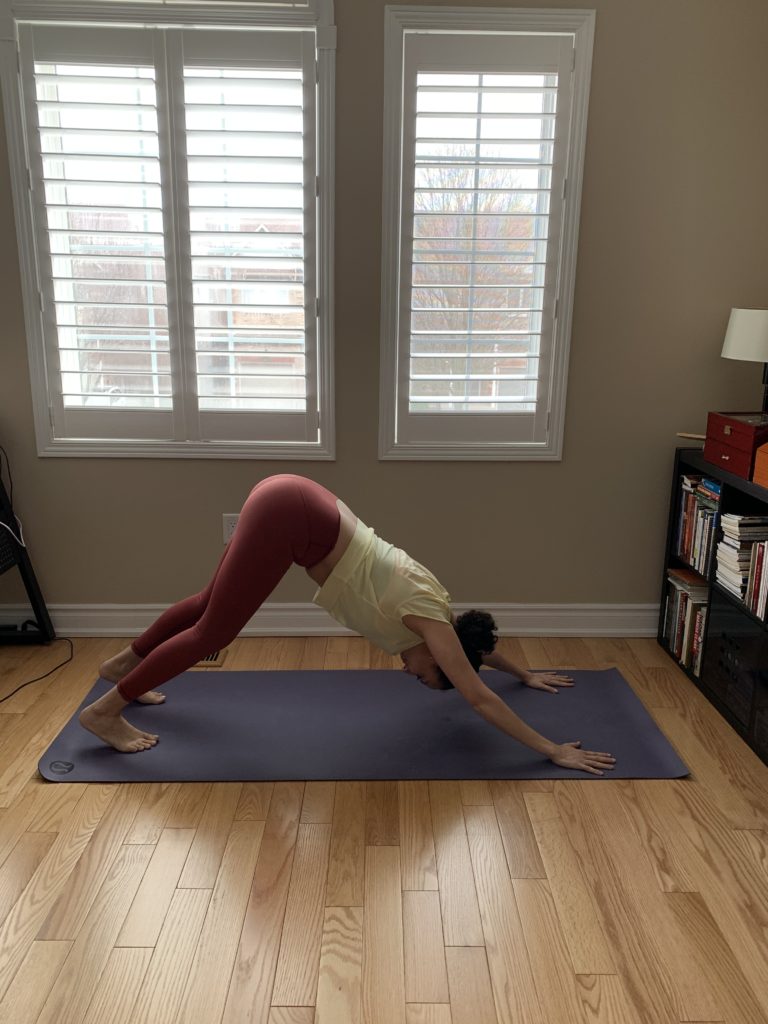
- In this way, your arms should become perpendicular to the ground and your shoulders position directly over your wrists
- If needed, you can slide the toes farther back
- Your whole spine should make a straight line and turn your gaze toward the floor, without letting the head hang down
- Gently pull the belly button in 2 inches toward the spine in order to engage the core
- If feeling wrist discomfort, press more into thumbs and index fingers
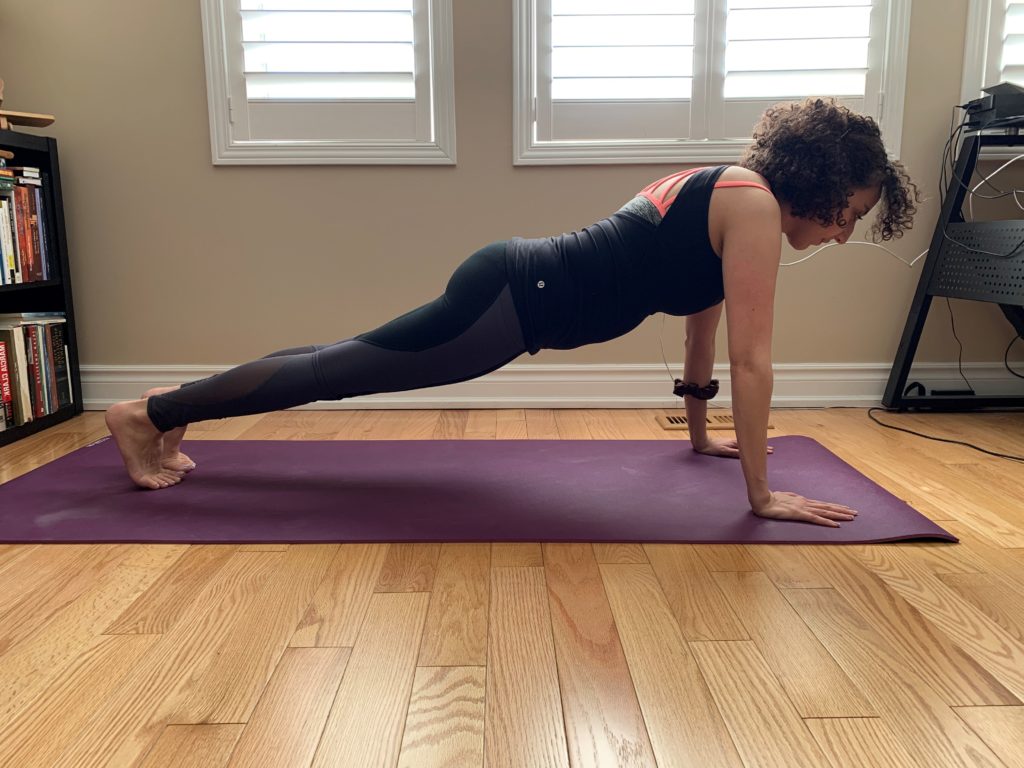
Hold position for 30 seconds, or 5 breaths. Then, bring knees down to come into Table Top to rest. Repeat 3-5 times.
3. Phalakasana (variation of), Knee-to-Elbow Plank Pose
This pose is a more advanced variation of the plank and can flow as a sequence from the Three-Legged-Downward-Facing-Dog (AKA One-Legged-Downward-Facing-Dog), or can simply be done from a High Plank position. We will describe the flow sequence in order to challenge your balance further and begin to get you more comfortable with the flow of regular practice.
- Start in Downward Facing Dog and then extend the right leg up into the air, foot flexed so that the heel points toward the wall behind you
- Keep the pelvis square to the floor, do not let it twist or dip with the leg raise
- As you are now on “three legs” now (Three-Legged-Downward-Facing-Dog), your balance will be challenged by the asymmetry of the pose
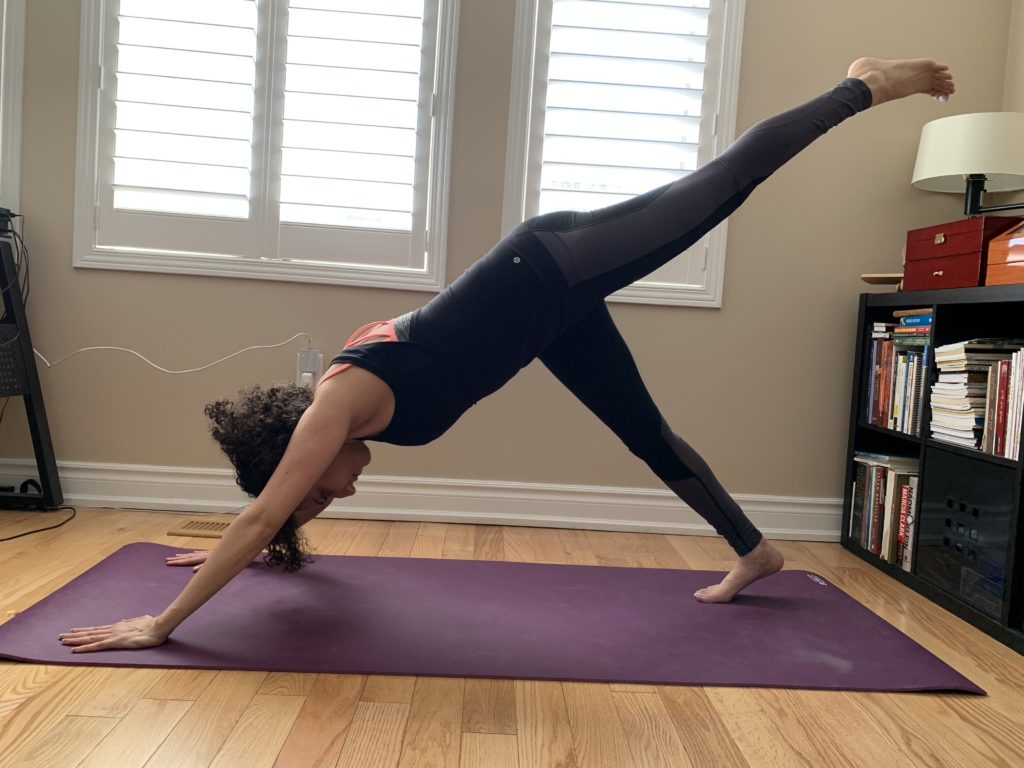
- From here, on inhale, shift torso forward as you lower the pelvis and bring the right knee toward the right elbow
- Pull belly button in two inches toward the spine to engage the core and stay in this position for 1-3 breaths
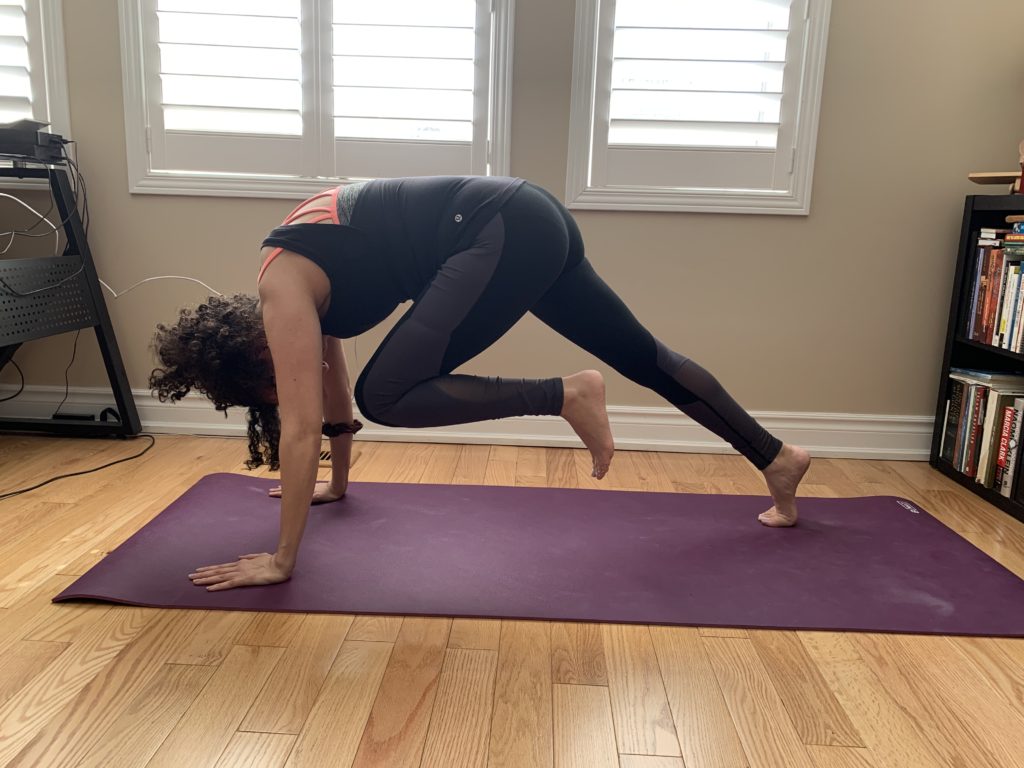
- On an exhale, return to Three-Legged-Downward-Facing-Dog
- Lower right leg down, and repeat with left
For further challenge, bring knee to opposite elbow, thereby adding a twist to the Knee-to-Elbow Plank.
4. Vasisthasana, Side Plank Pose
Side Planks are a great core exercise that works your balance and concentration. Additionally, they are a weight-bearing exercise that strengthens wrists, forearms, and shoulders. If you have wrist or shoulder pain, or find the straight arm position too challenging, try this position on your forearm instead!
- Start in either High Plank or Dolphin Plank (forearm plank)
- Twist your lower body (pelvis and legs) to face to the left, and place left foot on top of right (or in a staggered position, just in front of it)
- Putting your body weight through the right arm, slowly turn the torso to face to the left as well, extending the left arm up toward the ceiling. If extending the arm to the ceiling is too challenging, your can place it on your left hip instead.
- Pull belly button in two inches toward your spine to engage the core
- Make sure your hips are stacked one on top of the other; your body should form one straight line from the feet all the way to the crown of your head
- If you started from High Plank, the supporting hand should not be directly under the shoulder but slightly in front of it. Press through the base of your thumb and index finger.
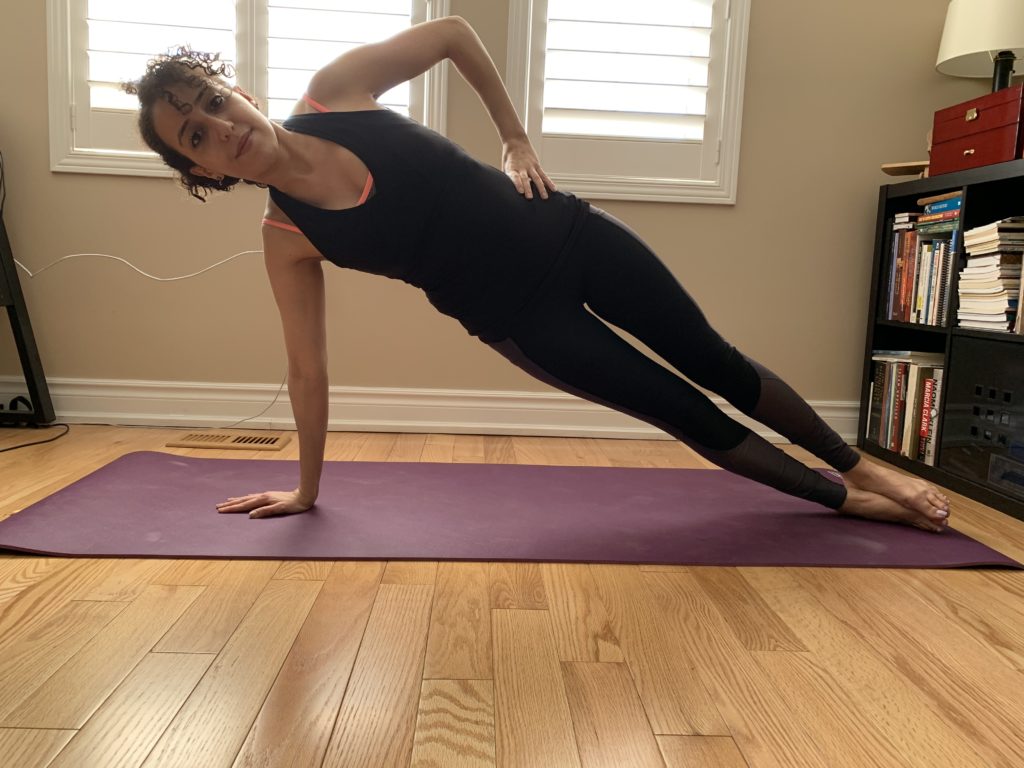
- If you started from Dolphin Plank, the forearm should be adjusted to be perpendicular to the body
- Keep your head neutral and gaze forward, or if able turn to look up toward the left hand as it reaches for the ceiling
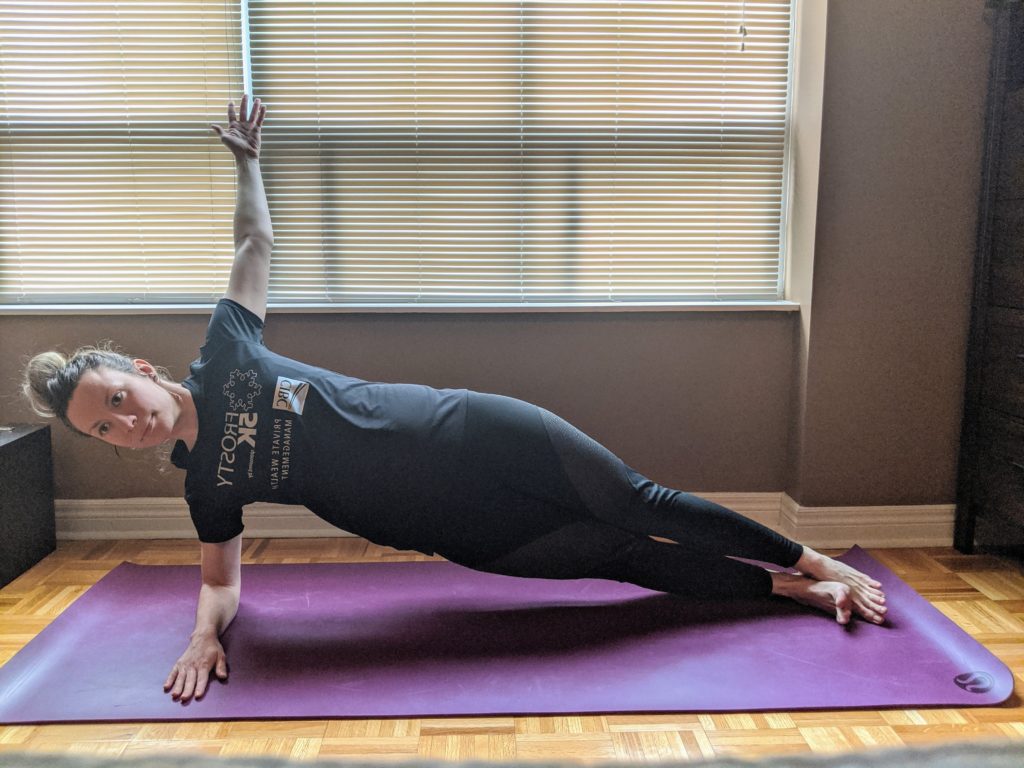
Hold position for 10 seconds while continuing to engage the core and take gentle breaths. When ready, return to High Plank (or even Table Top) to rest. Repeat 3 repetitions on each side.
5. Paripurna Navasana, Boat Pose
This pose works both your abs and hip flexors!
- Begin seated with legs straight out in front of you
- Place hands on the floor slightly behind the hips and press down
- Lean torso slightly back, keeping chest open and low back straight
- You should now be sitting more on the sit bones and tailbone area
- On an exhale, bend the knees and then lift the feet off the ground
- Gently pull the belly button in 2 inches toward the spine to engage the core and keep the low back straight
- If able, straighten out the knees. In this way, you’re creating a V shape with your body! If not able, keep knees bent and shins parallel with the ground.
- Lift arms in front of you so that they are alongside the legs and parallel to the ground. If not able, keep the hands on the floor, or lightly hold on to the backs of the thighs for stability.
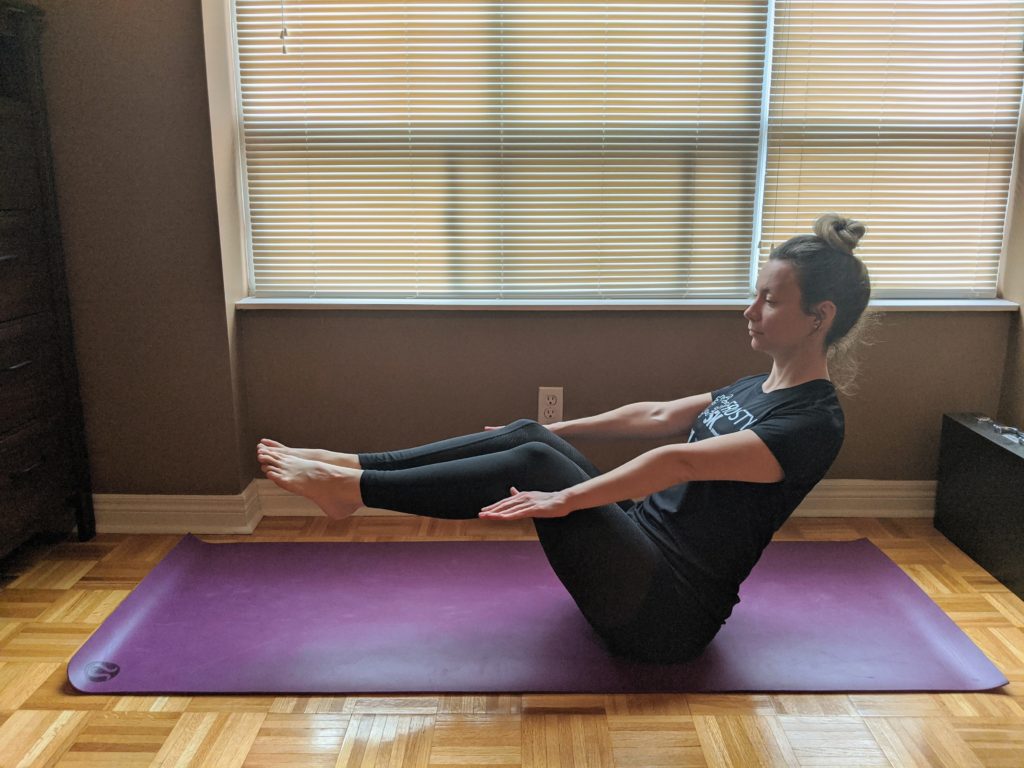
Hold position for 10-15 seconds, gently breathing throughout that time. Repeat 3-5x. Gradually increase the hold time as per your tolerance. Always keep the low back straight!
Bonus Sequence:
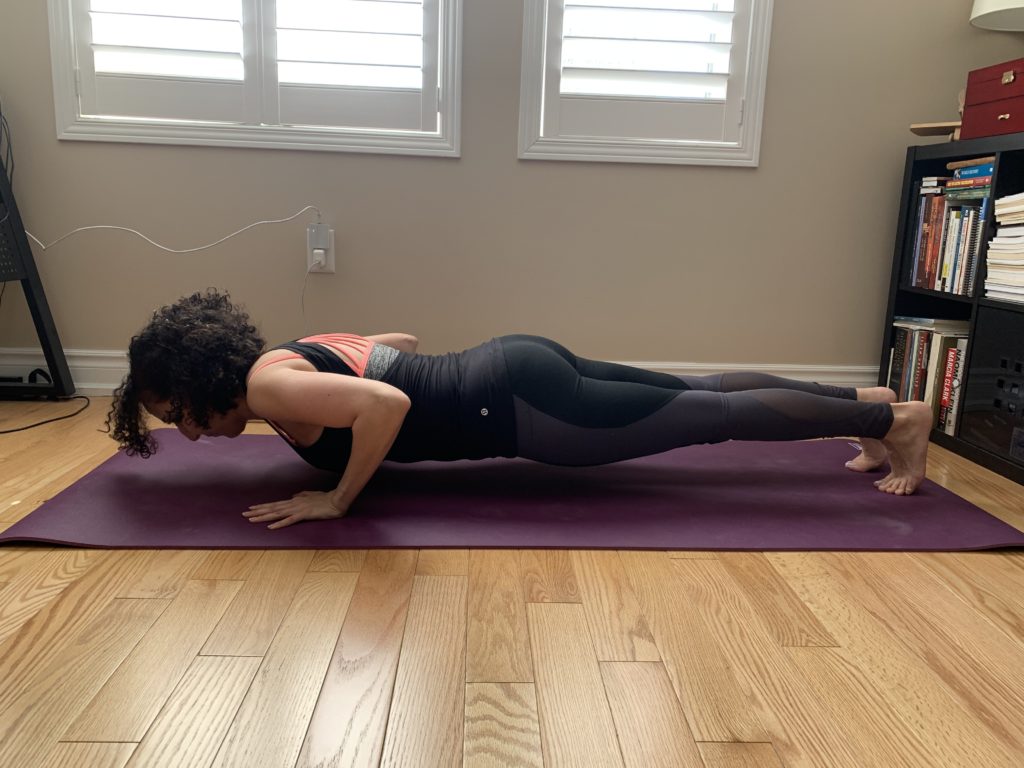
It’s time for another flow sequence! The main challenge here is the Chaturanga Dandasana, (Four-Limbed Staff Pose).
- Start from Downward-Facing-Dog
- On an inhale, shift forward to High Plank and pull the belly button in 2 inches toward the spine
- On an exhale, slowly lower your body to a few inches above the ground by bending your elbows to 90 degrees (or as close as you are able)
- Try to keep your body as parallel to the ground as possible. Aim to have your upper arms in line with your torso and your forearms perpendicular to the ground.
- On an inhale, straighten out the arms again as you lift up the chest and gaze toward the sky. Going into Upward-Facing-Dog, stay propped up on your toes, knees + thighs + pelvis still hovering above the ground. If this is too challenging, go into Cobra Pose instead (knees + thighs + pelvis can all rest on the ground).
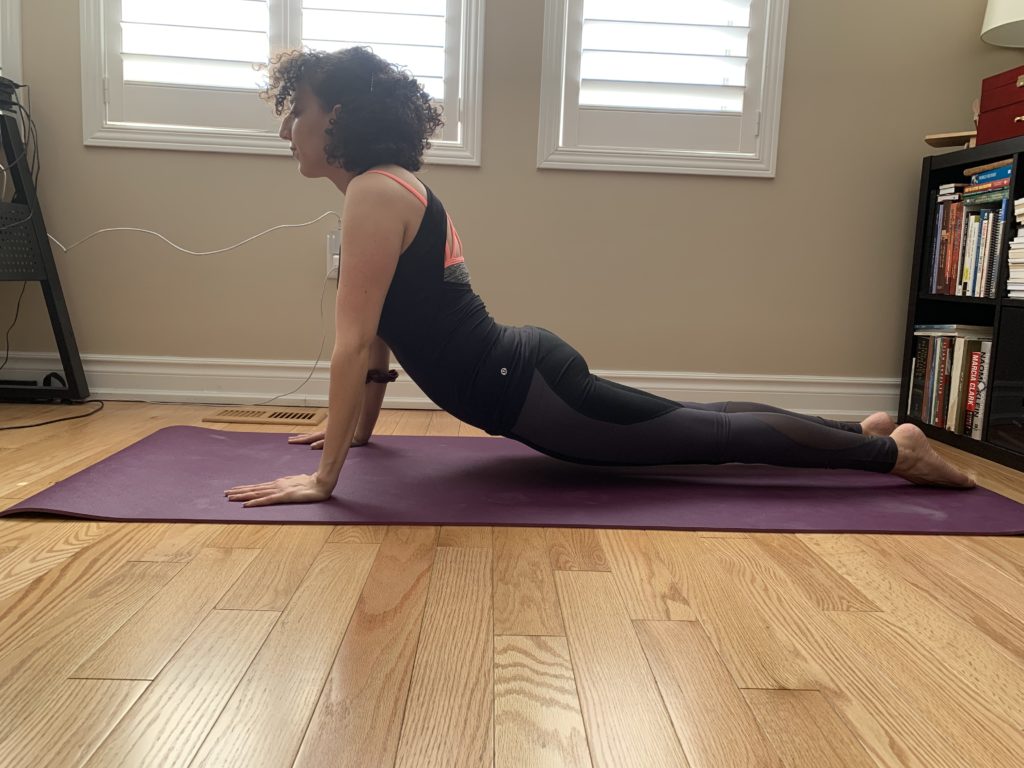
- On an exhale, engage the core and pull your hips up toward the sky to return to Downward-Facing-Dog
Congratulations, you have completed the bonus challenge! If you struggled with any of the above positions, that is okay. Start wherever you are able and gradually progress from there!
If you are experiencing pain or difficulty with range of motion while attempting these poses, or have specific goals you are working toward, or would just like some more guidance with your practice, let us know!

