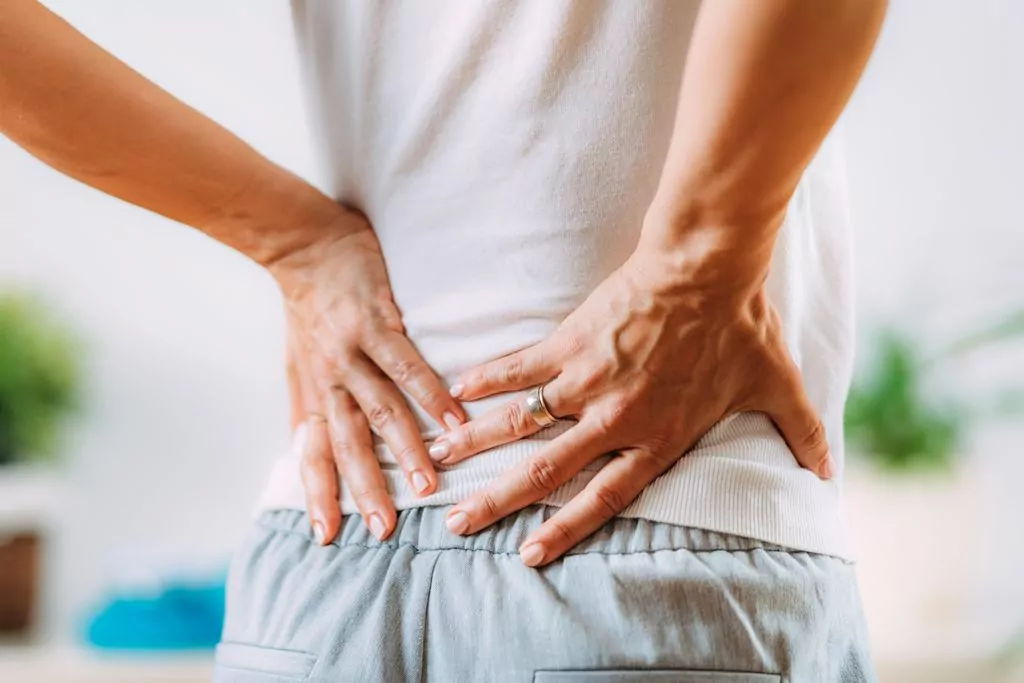
Chances are, if you’ve had back pain or leg pain, you’ve heard the term Sciatica.
So what is it?
Sciatica refers to an injury to or compression of the Sciatic Nerve. This is a very large nerve that originates in the lower back and runs down the back of each leg.
To give a bit of background detail… nerves innervate our whole bodies, and via electrical impulses, provide both power to the muscles and sensation to the skin. When a nerve is injured or compressed, we can experience symptoms of pain, weakness, numbness, or tingling.
Symptoms of Sciatica:
Pain that can go down the back of the leg (from the gluts, down into the back of the thigh, into the calf, and into the top or sole of the foot)
Numbness along the same area
Weakness in the leg with certain movements (e.g., does your foot get caught tripping as you walk? Are you able to walk on your toes?)
Tingling along the same area
Causes of Sciatica?
Disc bulges or herniations in the lumbar spine (the disc can press on the nerve)
Spinal stenosis (the canal through which the Sciatic nerve travels has narrowed due to arthritic changes and that can cause pressure on the nerve)
Piriformis syndrome (muscles in the glut area can get tight and compress the nerve as well)
If you are experiencing any Sciatic symptoms and they are not improving/worsening after 2-3 days, then Physiotherapy can likely help!
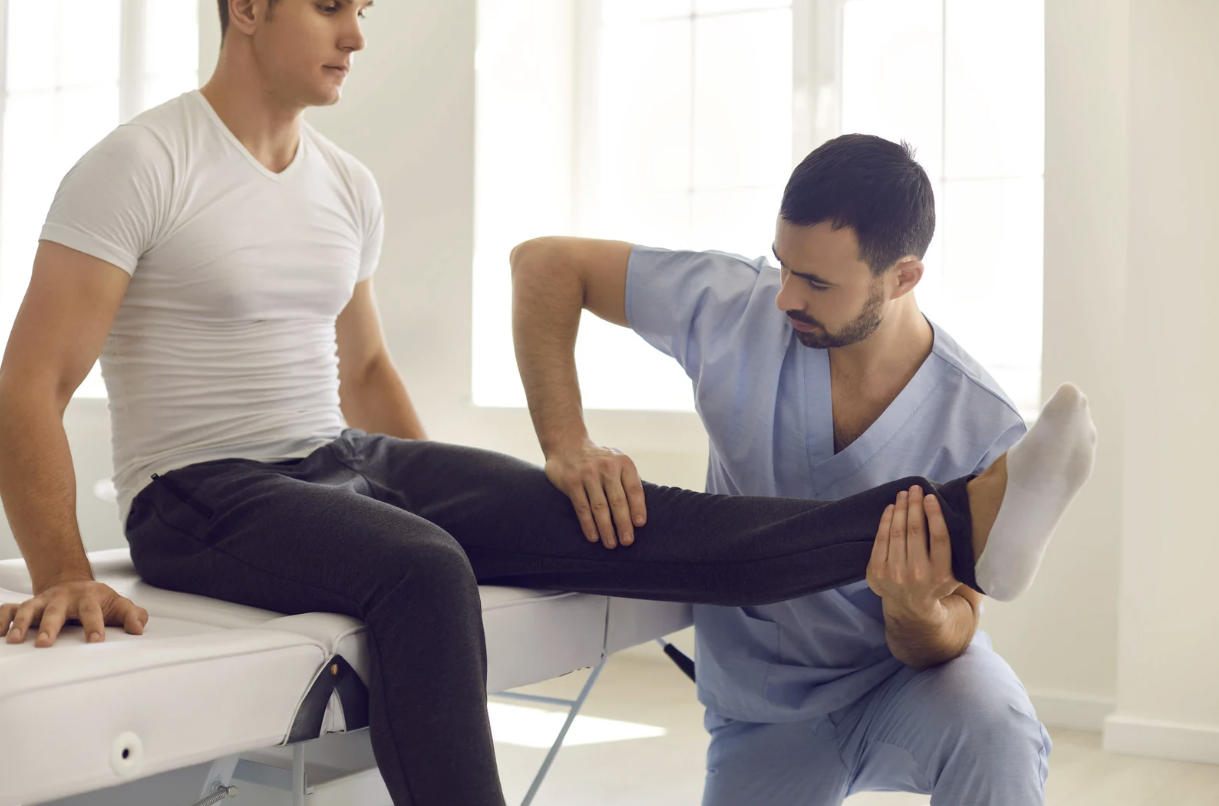
We do a thorough assessment to find the source of the nerve compression and provide:
Manual therapy techniques to relax tight muscles and help the nerve glide more easily
Additionally, manual therapy techniques can help take the pressure off from disc bulge or herniation and improve joint mobility
Exercise therapy to strengthen the back and core, stretch the tight musculature, and glide the nerve more freely
There are exercises we can show you that also help take the pressure off the nerve if the compression is happening in the spine
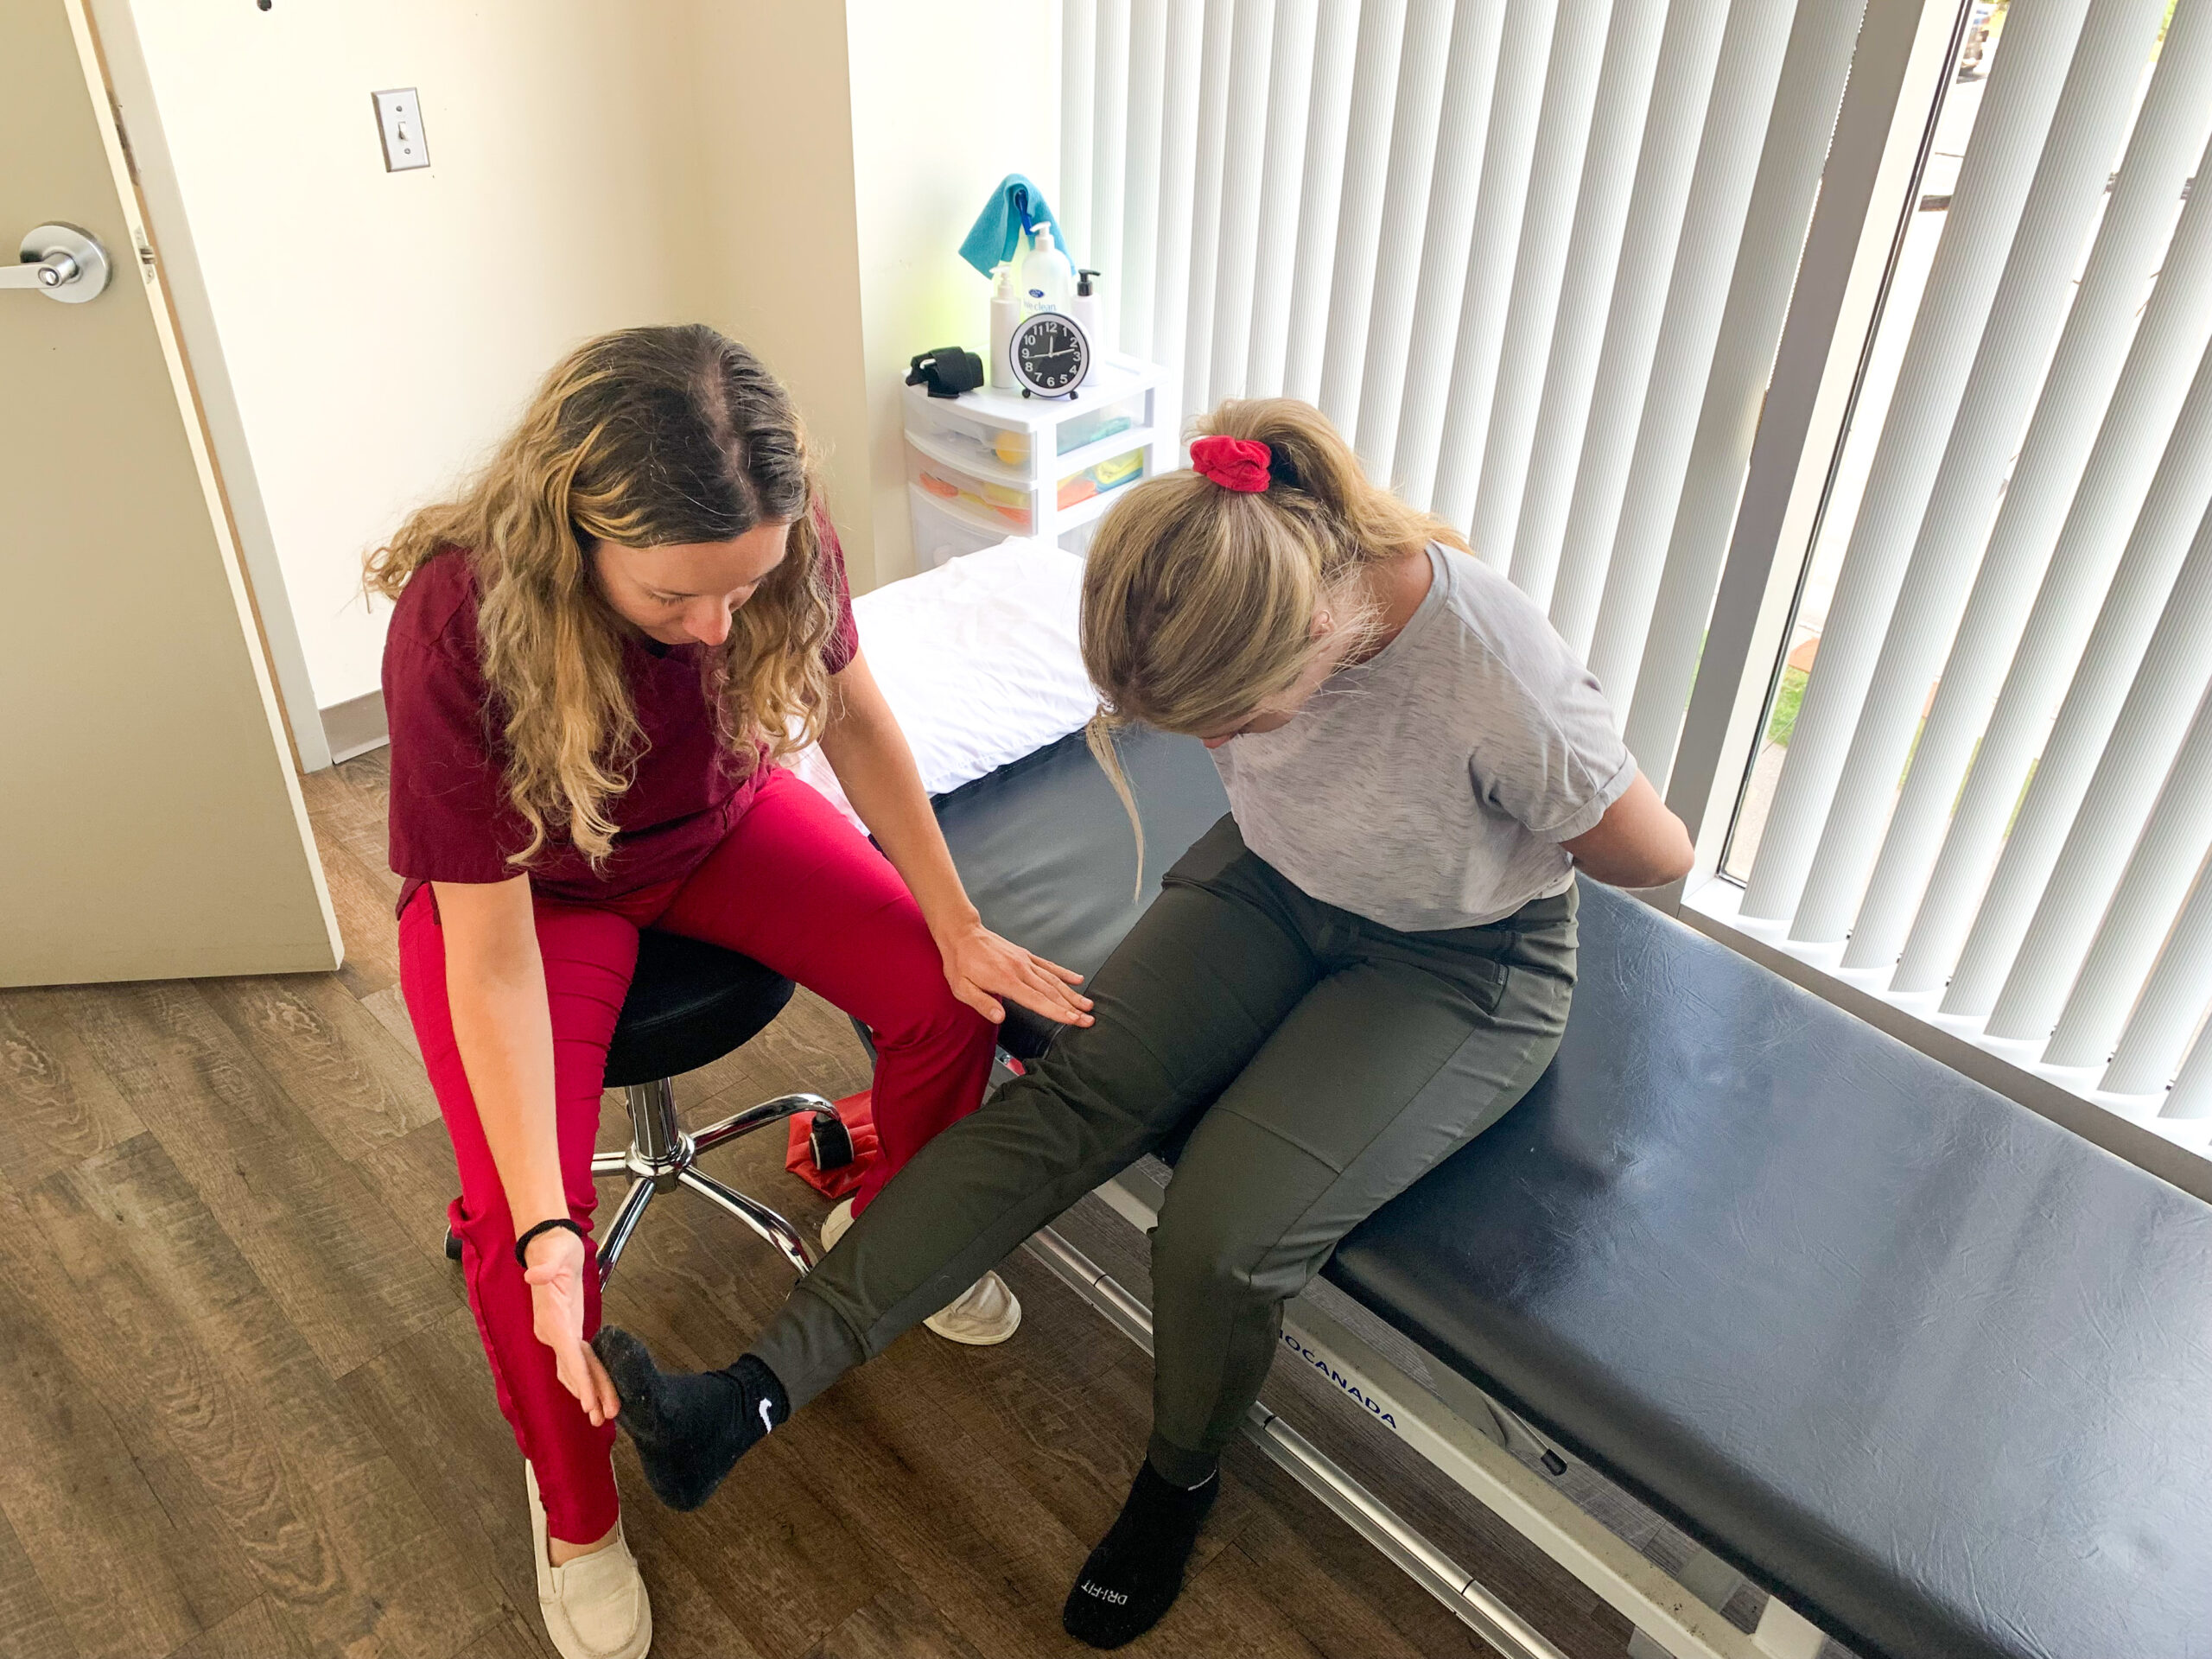
PT Kristina performing the slump test
If you’re not sure, you can always give us a call and ask one of our physiotherapists!
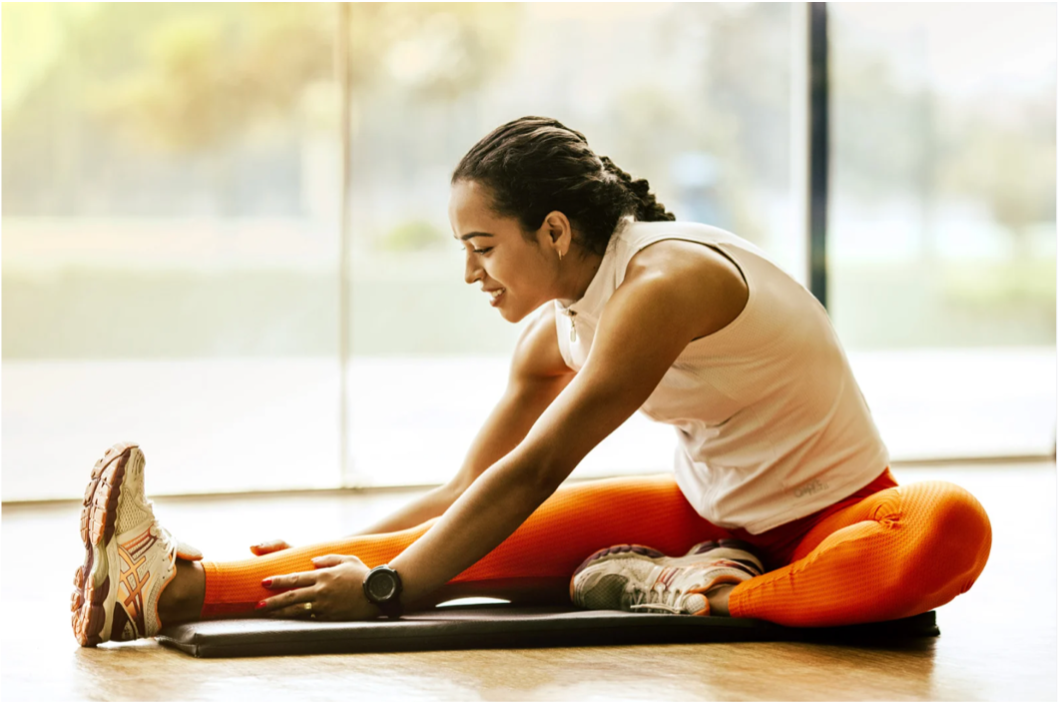
Other recommendations in the meantime:
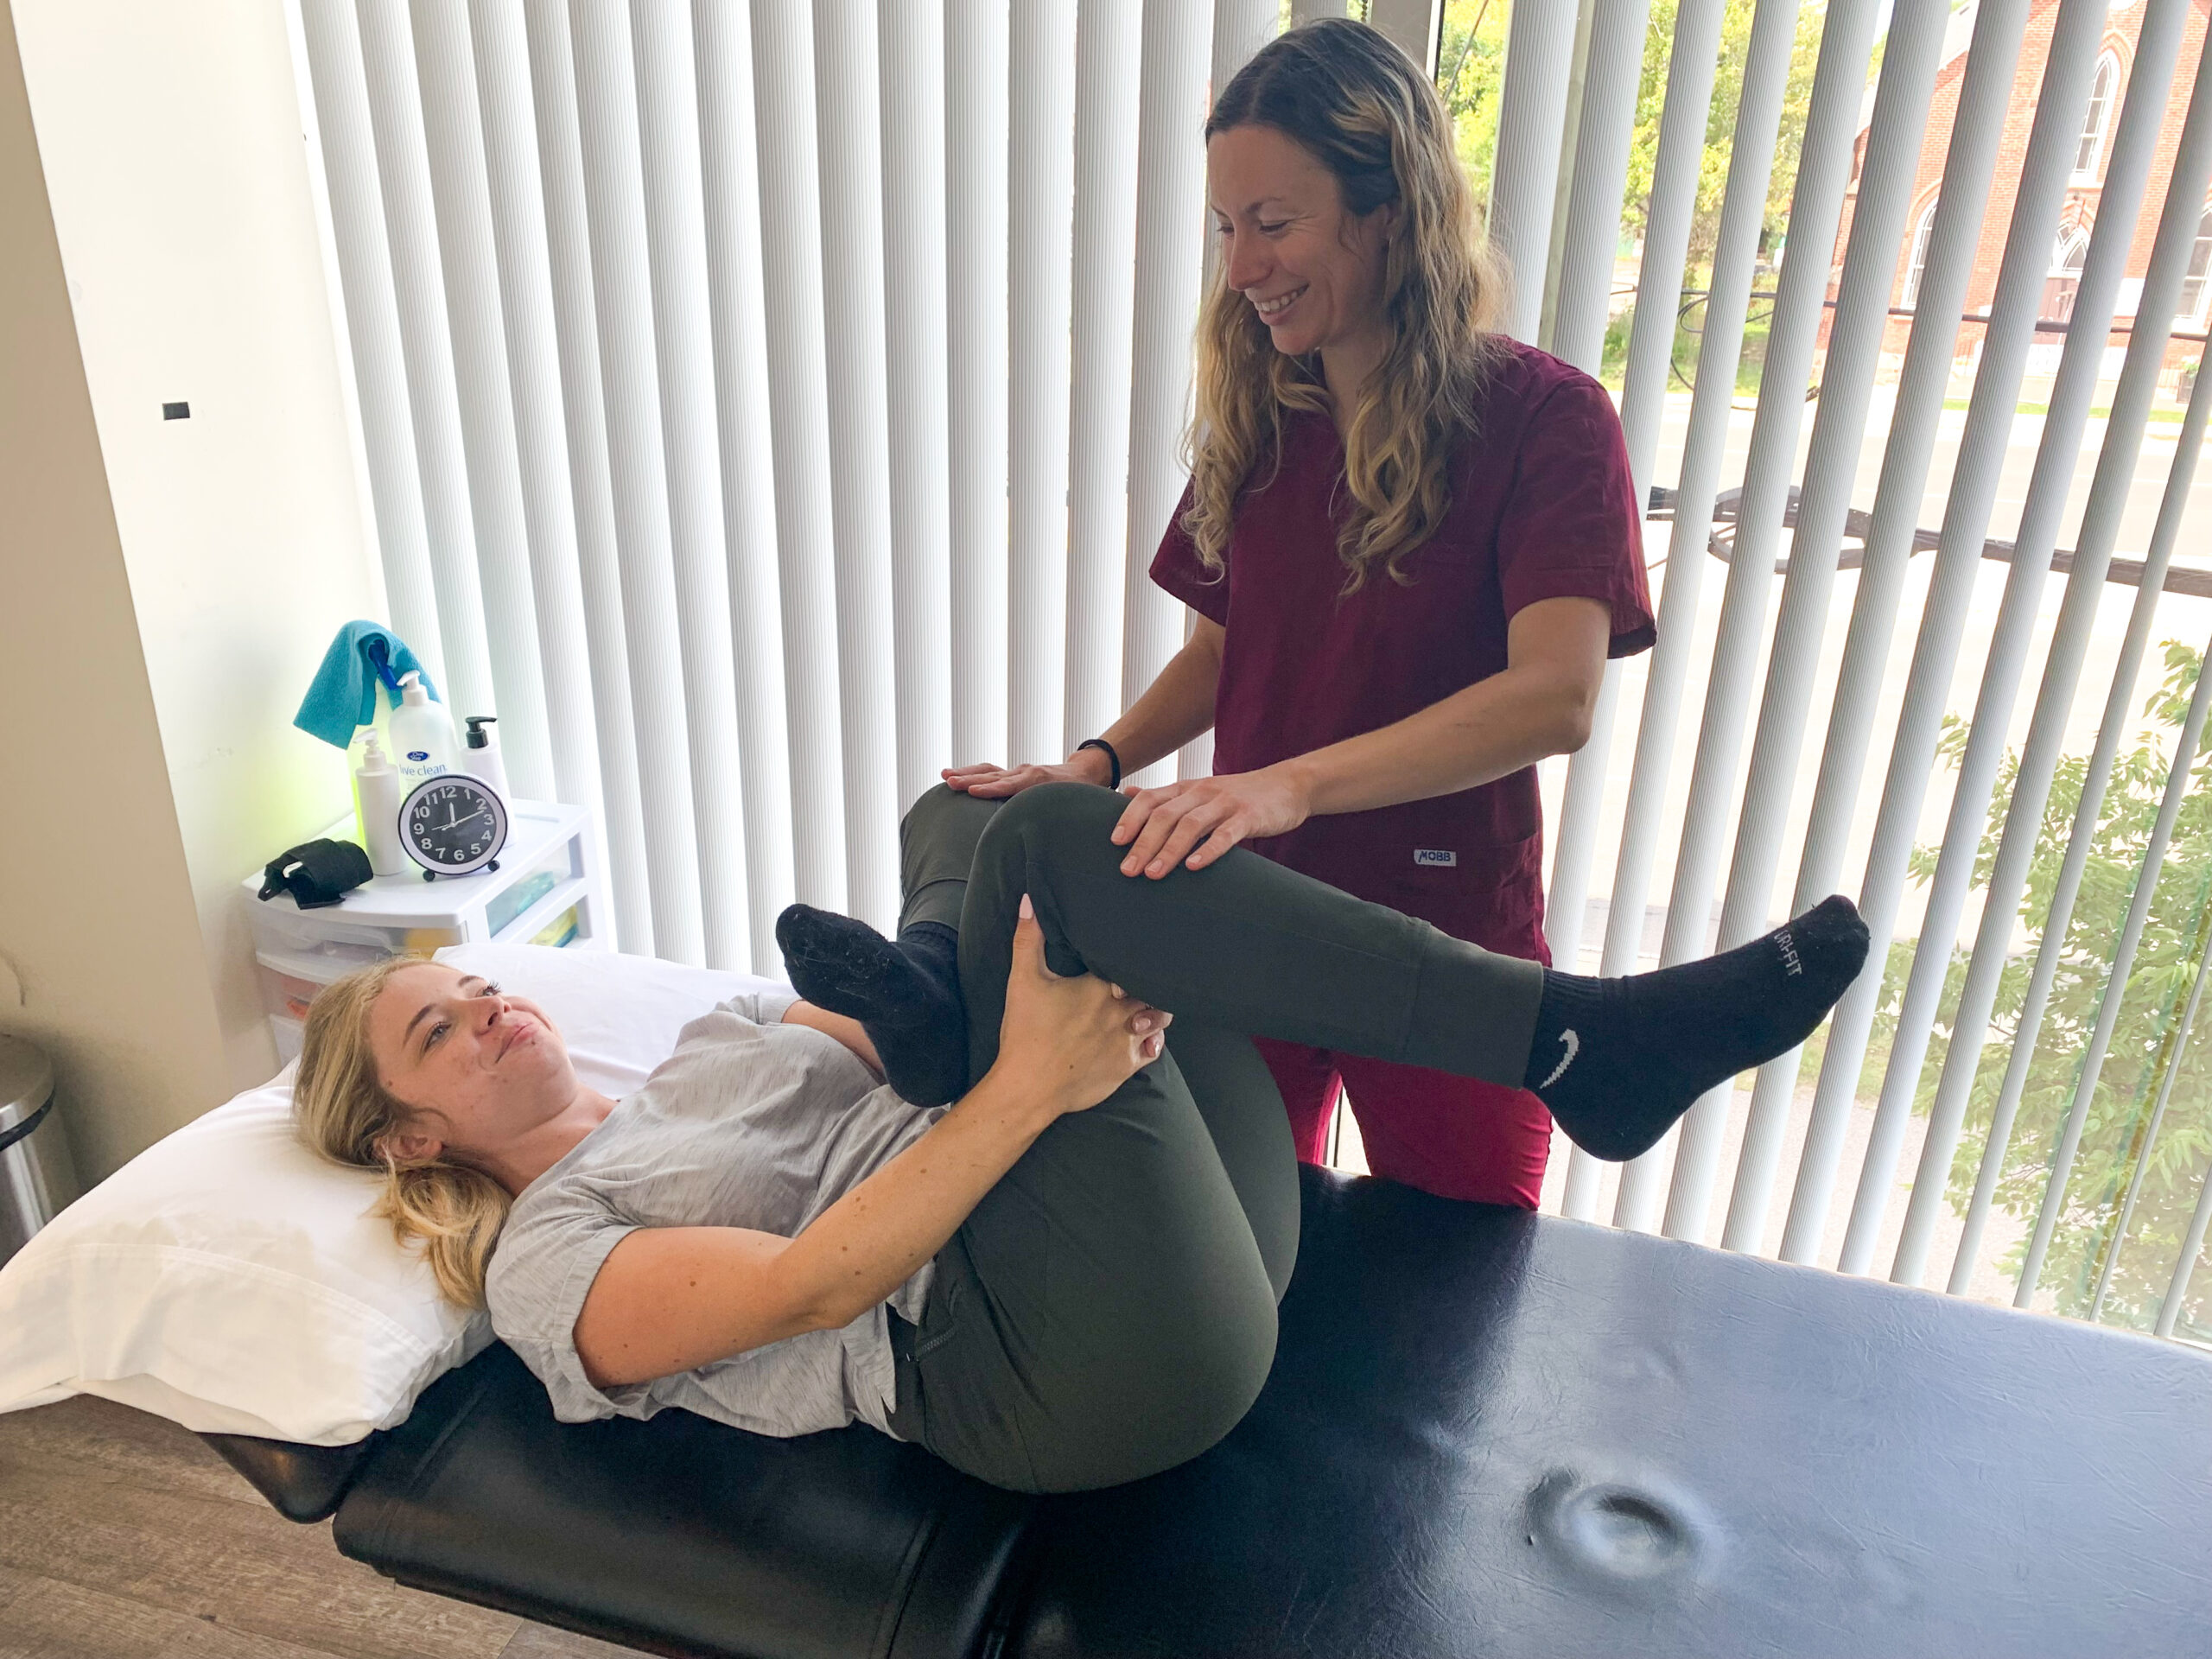
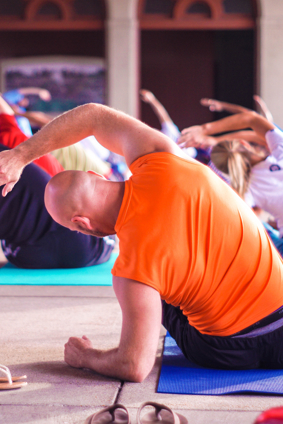
Performing gentle stretches like the image above can help relieve symptoms!
Try ice or heat on your back or gluts
Speak to your primary physician regarding pain management options
Avoid exclusive backrest
If you are doing any exercises that aggravate your symptoms, STOP them temporarily
Reduce your general activity i.e. “take it easy” for the first few days
Alternate positions (sit, stand, walk) rather than doing one for a prolonged time
Do not lift anything heavy, e.g. >20 lb, especially from the floor
Do not ignore this issue for weeks because it likely WILL get worse and it will then take longer to heal…
If you would like to learn more or book your initial physiotherapy assessment along with treatment, book your appointment now.
Osteoporosis is a condition that affects our bones by causing them to decrease in density, making them weaker and more prone to fractures. This condition is most common in women over the age of 50. The most frequent fractures associated with osteoporosis are those that occur in the wrist, hip, and spine. Our bones are continually turning over, meaning they are in a constant state of regeneration, where old bone is broken down, and new bone is produced. However, as we age, the rate of old bone loss increases faster than our body’s ability to generate new bone, resulting in weakened bones.
There are several factors that can increase the risk of developing osteoporosis, such as smoking, excessive alcohol consumption, lack of physical activity, and poor nutrition. However, there are also measures we can take to maintain good bone health and prevent osteoporosis from developing.
One of the most crucial steps to preventing osteoporosis is to increase our intake of Vitamin D and Calcium. Both of these essential nutrients are critical for bone growth. While sunlight exposure is the primary source of Vitamin D, it’s not always feasible to rely on it year-round, especially in regions with less sunlight. Therefore, it’s essential to obtain these nutrients through other sources such as diet or supplements.
Eating more lean protein such as poultry, fish, eggs, and legumes is another way to strengthen our bones. Studies have shown that higher protein intake is associated with higher bone densities, making it an important addition to our diet.
Regular weight-bearing exercise is also crucial in promoting bone growth and slowing down bone loss. Any physical activity that requires us to be on our feet, such as walking, jogging, or climbing stairs, stimulates bone growth, and can help maintain bone density.
Lastly, it’s important to consider lifestyle changes such as quitting smoking and limiting alcohol consumption. These changes can decrease the risk of developing osteoporosis and improve overall bone health.
If you have been diagnosed with osteoporosis or are interested in improving your bone health, consider speaking with a physiotherapist. They can guide safe and effective exercises tailored to your needs and abilities, and answer any questions or concerns you may have. By taking these steps to maintain good bone health, we can help prevent the onset of osteoporosis and live healthier, happier lives.
If you would like to learn more or book your initial physiotherapy assessment along with treatment, book your appointment now.
Improved Flexibility: Stretching helps to increase your flexibility by lengthening your muscles and improving your range of motion. This can help prevent injuries and make everyday tasks easier to perform.
Reduced Muscle Tension: Stretching can also help to reduce muscle tension and soreness. It can improve blood flow and help to release any built-up tension in your muscles, allowing you to feel more relaxed and less stressed.
Improved Posture: Stretching can help to improve your posture by reducing any imbalances in your muscles. This can lead to a better alignment of your spine and improve your overall body mechanics.
Increased Energy: Stretching can also increase your energy levels by stimulating your body and mind. It can help to improve your circulation and oxygen flow, allowing you to feel more alert and focused.
Effective Ways to Stretch:
Dynamic Stretching: This type of stretching involves movements that take your body through a full range of motion. It is an effective way to warm up your muscles before exercise and can help to prevent injury. Examples of dynamic stretching include lunges, leg swings, and arm circles.
Static Stretching: This type of stretching involves holding a stretch for a period, typically around 30 seconds. It is an effective way to improve flexibility and reduce muscle tension. Examples of static stretching include hamstring stretches, quad stretches, and shoulder stretches.
Foam Rolling: Foam rolling is a type of self-massage that involves using a foam roller to apply pressure to your muscles. It can help to release any knots or tension in your muscles and improve your range of motion.
Yoga: Yoga is a form of exercise that involves stretching, breathing, and meditation. It can help to improve flexibility, reduce stress, and promote relaxation. There are many different types of yoga, so it’s important to find one that suits your needs and abilities.
In conclusion, stretching is essential for maintaining a healthy body. It has numerous benefits and advantages that can improve your overall health and wellbeing. By incorporating stretching into your daily routine, you can improve your flexibility, reduce muscle tension, improve your posture, and increase your energy levels. There are many effective ways to stretch, including dynamic stretching, static stretching, foam rolling, and yoga. So why not start incorporating stretching into your daily routine and experience the benefits for yourself?
If you would like to learn more or book your initial physiotherapy assessment along with treatment, please feel free to contact us.
For being a small joint, having pain or issues in our thumbs can cause us big problems!
Our thumbs help us grip, and grab in fine ad gross motor tasks. From carry a baby seat to holding your hand open in a baseball mitt, to knitting and chopping dinner, you don’t realize how important you thumbs are until you have thumb pain that prevents you from doing these things comfortably.
Even though it’s a small area, your Physiotherapist and Massage Therapist take your complaints seriously. Like all injuries and pains in the body your physiotherapist will take a thorough history of our health, habits, the onset of the issue and how it is presenting. They will take you through movements and special tests to rule in and rule out various issues and types of tissues.
Like many issues in the body thumb issues and pains can from the joints (where the bones meet), the tendons, the muscles, and the ligaments. In some cases it can be more than one thing contributing to the pain.
Chronic Thumb Pain / Issues
With chronic or ongoing thumb pain Physiotherapists often look to the joints or the tendons as a primary culprit.
Osteoarthritis (OA) – the carpometacarpal joint of the thumb can cause ongoing thumb issues. As Physiotherapists we look to patterns of pain. The thumb joint may have a squaring type of change and the joint line may be tender to the touch. Your physiotherapist will work with you on your goals to help you protect the joint, manage your pain and get you closer to activity. Having osteoarthritis does not mean you cannot improve your pain.
Tendinosis – The tendons of the thumb connect the muscles to the bone. They act as a pulley system. These tendons over time and with repetitive loads can wear and thicken. Although less common than other areas of the body this can be an issue in the thumb. Your physio or massage therapist may suggest working on these tendons and the surrounding muscles. They may provide you with exercises to strengthen the area as well. Sometimes modifying what you do can also be part of the trick.
Trigger Thumb – Having the thumb catch and get stuck during movement can be painful, or not. When you move your thumb into a fist and then try and open it it may catch or click. For some people, they have to use their other hand to open the thumb back up. This can also happen in the fingers and is aptly named “trigger finger”. This is also known as “stenosing tenosynovitis”. The tendons move through the tendons sheaths and a series of pulleys. In trigger thumb or finger, an enlarged flexor tendon gets trapped or caught up in the pulley system. The area of entrapment may be closer to the palm than the area that gets “stuck”. This area of entrapment can be painful, but is not always. Your physiotherapist or massage therapist will give you treatment depending on how this presents and how it is affecting your daily life.
Like most things, these painful thumb issues are best treated early. If you have been having thumb pain that is new, not going away, is impacting your activities of enjoyment, or is worsening, it is helpful to have a thorough physiotherapy assessment. If the issue has been there for longer or there has been an increase in pain, physiotherapists are also a part of your team.
Our next blog post will talk about more acute, or sudden injuries of the thumb.
Contact us at our Oakville Physio, Massage, Yoga, and foot clinic to book with one of our trained practitioners.
While many people experience a pivot from an expected vaginal delivery to an emergency Cesarean Section (C-Section) birth. There are also many people who have a planned or scheduled C-Section.
If this is the case, Physiotherapist can help prepare you in advance for the birth as well as the first few days. While many people try and soften the process by titling it a “C-Section birth” and a view point that it is as valid of a birthing process as a vaginal birth (which it IS!). A C-Section is still a surgical procedure that has different considerations when it comes to recovery than a vaginal birth.
It is possible to have have pelvic floor issues post c-section even when / if a person has not laboured, had to push, or delivered vaginally.
Postnatal Physio-C-Section
These pelvic floor issues post C-Section may be:
Pain / discomfort with urination
Stress or urge urinary incontinence
Pelvic floor pain or discomfort
Bowel issues / constipation
Pelvic organ prolapse (POP)
In the early days post C-Section your pelvic floor focussed physio can provide you with a plan in how to set your home environment up to best help your own recovery as you care for a newborn.
Once your C-Section incision is healed, your pelvic floor focussed physio can assess and gently treat your scar / incision or the surrounding area. Your Physio can also assess your pelvic floor. You should be provided with some education and a plan of how you can self treat at home and how to fit it into your new life!
If you have not had your scar massaged or worked on by a physio and you are further down the road of your recovery, if is never too late. People are often surprised by how much C-Section scar work as part of physio treatment can help with low back issues and pelvic floor tension / issues as well as in the local area.
If you are interested in a pre-hab or prenatal physiotherapy session for a schedule C-section we are here for you. We are able to see you in person in our North Oakville Physio clinic. We are also able to “see” you virtually via Telehealth if you are residing or have a permanent address in Ontario.
Ever since we re-opened our physical doors on June 1st, 2020 (during the initial lockdown, we were only available for virtual therapy!) some cases have stood out more than others…
A lot of neck / upper back / shoulder / arm pain as people are working exclusively from home
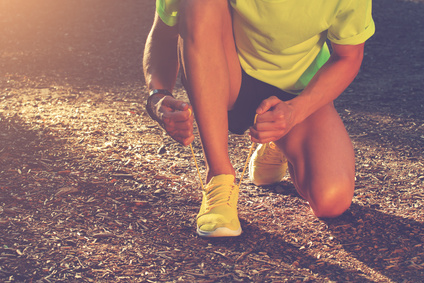
Injuries resulting from people taking advantage of being home to exercise more, specifically by running (e.g. Achilles issues)
Chronic issues resurfacing because people have not being able to work out regularly at the gym (e.g. back pain)
1. Neck / upper back / shoulder / arm pain
The first issue has been directly as a result of the change in ergonomics and working longer hours! Think about it. If you didn’t have a home office, you probably ended up working at the kitchen table, or from the couch. Sitting for eight hours in a kitchen chair, or sinking into the couch the whole time, can get quite uncomfortable.
Plus, at home we don’t have meetings in conference rooms… we don’t drive to see clients… we don’t get up to go talk to someone at another desk… There are lot less breaks from sitting and a greater opportunity to work longer, especially when there is no commute back home!
So… we end up spending longer time in positions that are less than ideal, and end up putting stress on certain muscles or joints.
Not to mention the stress associated with a pandemic! You don’t know how long it’s going to last and it affects your life in so many ways both work and non-work related… And stress causes us to tense up, raises our heart rate and blood pressure, reduces our adaptability and immune system…
It’s no wonder we start having pain!
So what can you do about this?
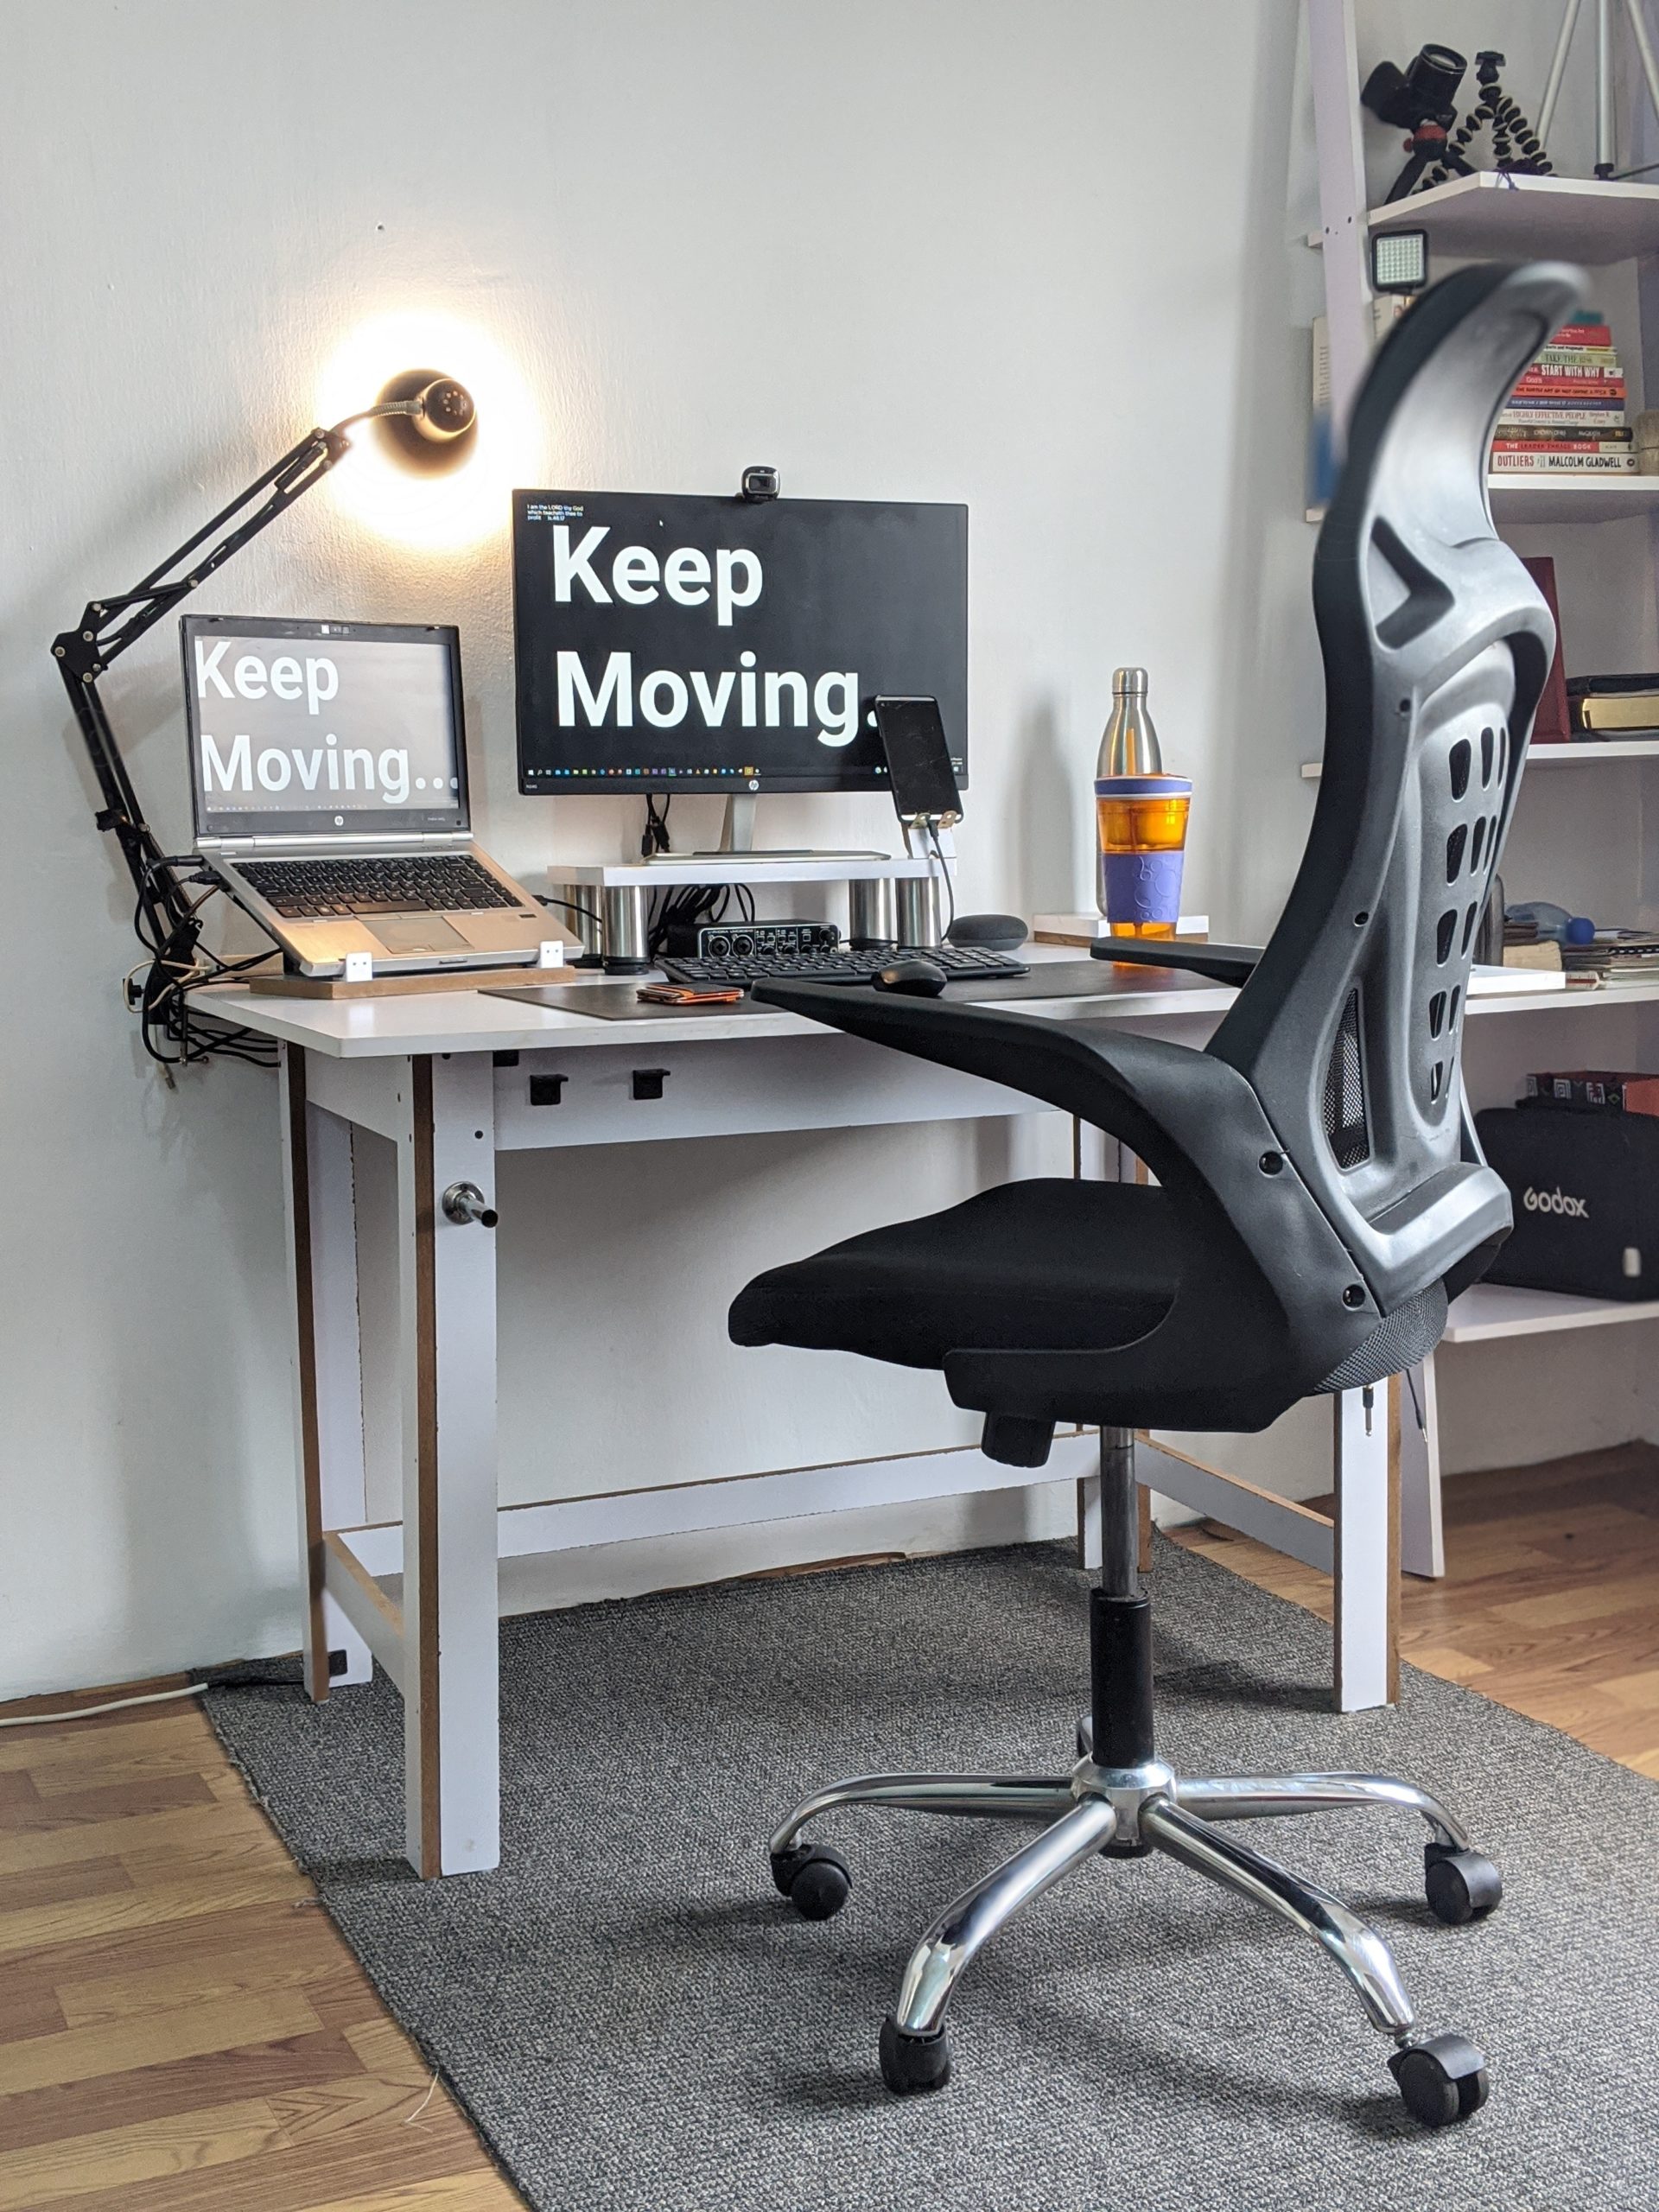
The pandemic is not going away any time soon. If you haven’t already, it might be a good time to invest in your workspace at home. Here are some suggestions about how to optimize your workspace:
Desk and chair height should allow for your forearms to be parallel to the ground while keyboarding and mousing
Ideally, chair height should allow your feet to comfortably rest on the ground
Seat depth and distance from desk should allow for you to sit as far back as you can, so that you are taking advantage of the backrest
Backrests for the full back are preferable to backrests that only go up halfway
Backrests with adjustable lumbar support are preferable
Screen(s) should be at eye level so you are not constantly looking down
If you use a laptop only consider getting a riser table so that the screen is at eye level, and a wireless keyboard so that your forearms can still be parallel to the ground
Consider setting up reminders on your phone to get up to move and stretch, or get a drink of water
If possible, consider switching for half an hour to the kitchen island with your laptop so you spend some time standing instead of sitting. Or, when you have conference calls, taking them standing.
An optimal workspace ergonomic setup at home can make a huge difference!
These ergonomic modifications can make a difference over time. But if your pain has been worsening, let us know so we can help! We are considered an essential service and remain open during lockdown for all of our services: physiotherapy, massage therapy, yoga therapy, chiropody, and acupuncture!
2. Injuries from exercising more
A lot of people have been walking more, especially in the past Spring and Summer. There have also been a lot more runners and cyclists. This is great news! These are activities that don’t require much (or any) fancy equipment and can be done alone, or with family.
However, when you are adding a new activity for exercise, overdoing it is a concern.
Here are some tips when adding in new exercises to your routine:
Do not go from 0 to 100! If you never used to run, start with 2-3x week, not every day.
Do not push yourself right off the bat! Start with light jogs, or a run-to-walk ratio. Think more about endurance (pacing yourself) rather than speed. Same goes for biking.
Fit bits and 30-day challenges are great motivators. However, pushing yourself to the limit for the sake of hitting a mark can cause more issues than it’s worth. If you are getting pain, do NOT push through it! If you really don’t want to skip the day, replace or modify the activity.
Recovery days are just as important as workout days. Whether it’s a full day of rest, or a lighter activity like yoga, recovery days are important to let your tissues recuperate and adapt. What’s more, exercise normally increases your heart rate, blood pressure, and muscle tension. Recovery activities are meant to reduce these metrics so your system is in more balance. This reduces the risk of injury.
If you’ve taken up running have you been having any foot, ankle, knee, hip, or back pain? If you’ve been cycling, any wrist or elbow or shoulder pain?
Running and walking are great activities during the pandemic to stay active.
Let us know so we can help! If you’re not comfortable coming in due to COVID-19 concerns, we continue to offer Telehealth services (video calls).Click here for more information.
3. Chronic issue resurfacing because we are not going to the gym
Do you have any chronic neck or back issues? Did you have a regular workout routine prior to the pandemic? Was this routine interrupted as a result and you’ve been noticing your old issues creeping back in?
If so, you are not the only one!
A lot of people manage certain conditions with regular exercise. They usually notice that if they are not as diligent about their exercises, their pain and mobility may worsen.
Unfortunately, access to gyms has been spotty. Even when lockdown restrictions were lifted in Summer and Fall, gyms were operating at limited capacity and by appointment-only. Unless you have all or most of your workout equipment at home, you were likely affected.
While investing in a new desk or office chair is cheaper and more pressing, investing in workout equipment is not. You may buy some free weights, or splurge on a stationary bike, but you likely are not replacing all the equipment you used to use at the gym.
Or perhaps it’s not the equipment that you miss, but the dynamic and instruction of group exercise classes.
Unfortunately, in-person exercise classes are gone for a while, but there are other options!
So what can you do?
Even if you don’t have chronic pain but would like to get back to being active, here are some ideas:
Accept that your workouts do not have to look like what they used to be. A lot of shoulder, core, and leg exercises have equipment-free alternatives that rely on body-weight resistance only!
If you have some free-weights but you used to use machines, the free-weights are still better than nothing!
If you miss the group classes, a lot of places have online classes. It may not be the same but it’s still better than nothing! Sometimes, it just takes a while to get into a new routine.
Take the opportunity to try a new form of exercise that doesn’t require gym equipment (just make sure you follow the tips outlined in the previous section!)
If you find it hard to get motivated at home, consider what puts you in the right state of mind… what kind of music do you like working out to? Is there a time of day that works best? Do you like having the motivation of peers? Then ask if some friends want to join you in a remote challenge! Are they free 2-3x week to attend an online class with you? Do they want to check in at the end of each week or each day to make sure everybody is meeting their activity goals?
If you need 30-60 minutes on your own 3x week for your health and well-being, have this conversation upfront with family members about helping you do this and how it’s going to work! You don’t have to do this alone!
If your chronic issue has flared up because of the lack of maintenance, let us know! We are here for you whether it’s an in-person appointment or virtually!
Our Oakville Physio’s, RMT’s, Chiropodists and Yoga Therapists all wear medical masks throughout their day at work.
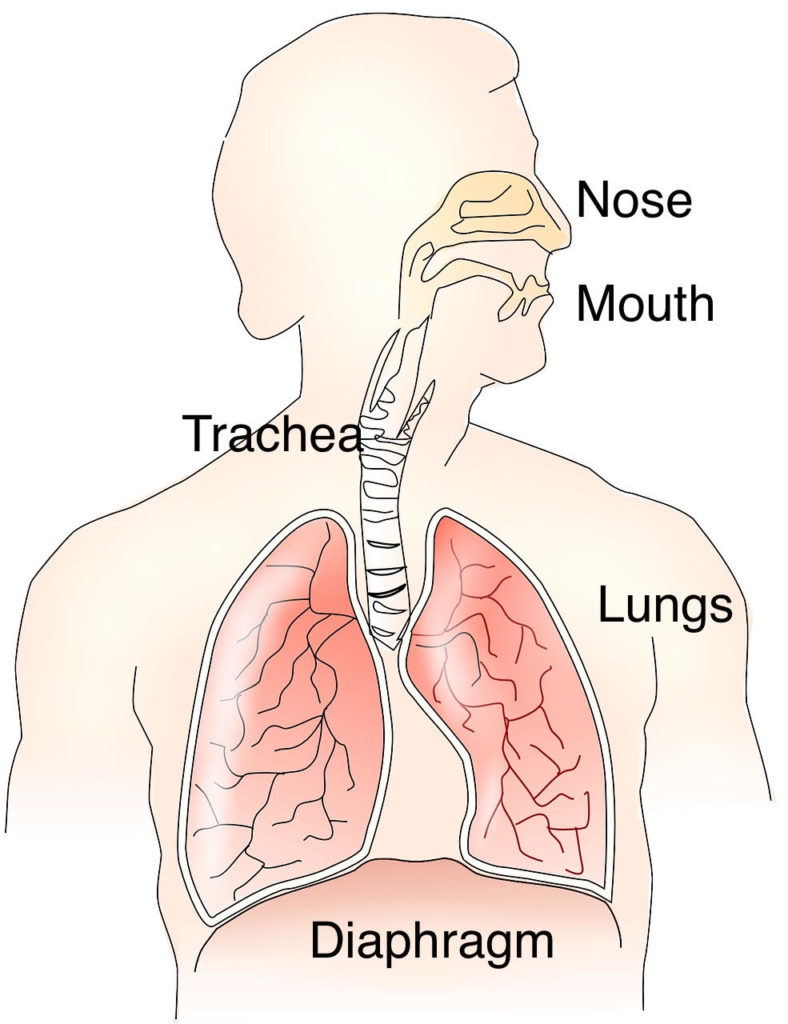
Wearing them for so long, many of us are aware that we’ve been spending more time mouth breathing.
Is wearing your mask making you more of a mouth breather too?
There are many surprising negatives about being a consistent mouth breather rather than a nose breather. It is generally much healthier to breath through your nose rather than your mouth.
The resting position of your jaw and mouth should be as such:
Lips closed gently
Tongue rests gently on the roof of your mouth behind the front teeth (not pressure the teeth)
Teeth rest around 3mm apart (molars are not touching)
Negatives of Mouth-Breathing:
Mouth breathing is be associated with snoring and sleep apnea
Can cause bad breath through altering the bacterial population in the mouth
Leads to dry mouth, teeth, tongue and gums. This alters levels of acid in the mouth and can lead to tooth decay
Mouth breathers can have altered head and neck positioning. This can lead to neck pain and tension as well as TMJ (Jaw) pain.
Positives of Nose-Breathing:
Removal/ filtering of germs, irritants and bacteria
Nitros Oxide is released in the nasal passages and follows the inhaled air into the lungs. This is important to immune responses and vasoregulation.
The nose and nasal passages warm and humidify the air inhaled
Breathing in and out of your nose keeps air in the lungs for longer. This can increase the amount of oxygen that enters the blood stream with each breath.
Allows for better mouth, jaw and facial development.
Check in with yourself during the day in and out of your mask.
What is your resting state of breathing?
Try and revisit the above resting state of breathing we discussed.
Many people our Oakville Physio’s and Massage Therapists treat with neck, shoulder and TMJ issues can benefit from revisiting this type of breathing. Our Yoga Therapist does and excellent job linking this breath with stretching and movement. This helps it become more natural once again.
Contact us to book in with one of our professionals. We are able to direct bill to most insurance companies. We continue to see people in- person from the surrounding Oakville, Milton and Burlington areas and virtually (video call) from all over Ontario!
There are many styles of yoga, some more modern than others, and some which are combinations or derivatives of more traditional styles.
For our purposes here, we will describe the five main styles you are likely to encounter in a yoga studio near you!
This way, when you sign up for a class, you will have a better idea of what to expect and if it’s for you! 😊
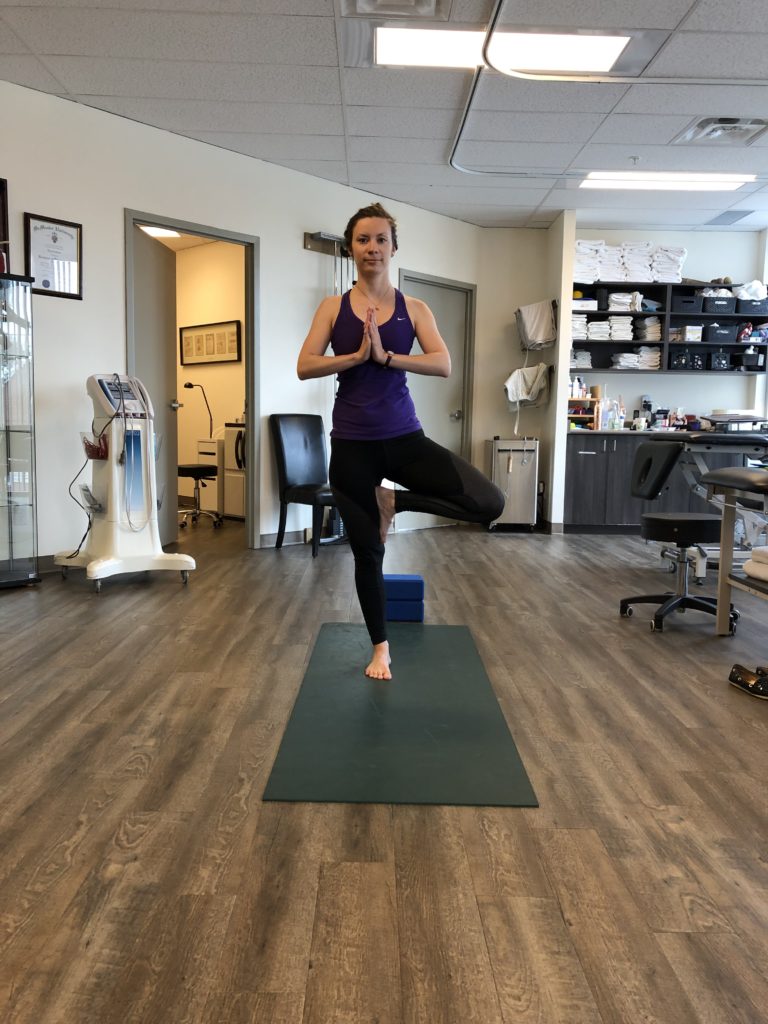
1. Hatha Yoga
Hatha is referred to as “physical-based” yoga because it is more grounded in physical practice (as opposed to other types of yoga that are grounded in more abstract concepts such as spirituality, self-discipline, or even energizing techniques).
It is also a more generalized style of yoga which makes it great for beginners:
Provides an introduction to the most basic asanas (yoga postures, or poses)
Practised at a slower pace
Provides some focus on meditation, breathwork, and relaxation
In fact, most Western classes are hatha-based.
Tree Pose is one of the classic Hatha poses
Therefore, best for beginners and those who prefer a more relaxing practice!
2. Vinyasa Yoga
Translated from Sanskrit, Vinyasa means “to place in a special way”, as in the arrangement of steps, or the flow from one asana to the next. This flow sequence is coordinated by the breath, from an inhale to an exhale.
Vinyasa Flow practice is more intensive than Hatha:
More challenging poses, focusing on strengthening all parts of the body
Poses and sequences are variable, depending on the creativity of the teacher
Classes can have different themes, and so, no Vinyasa class is the same!
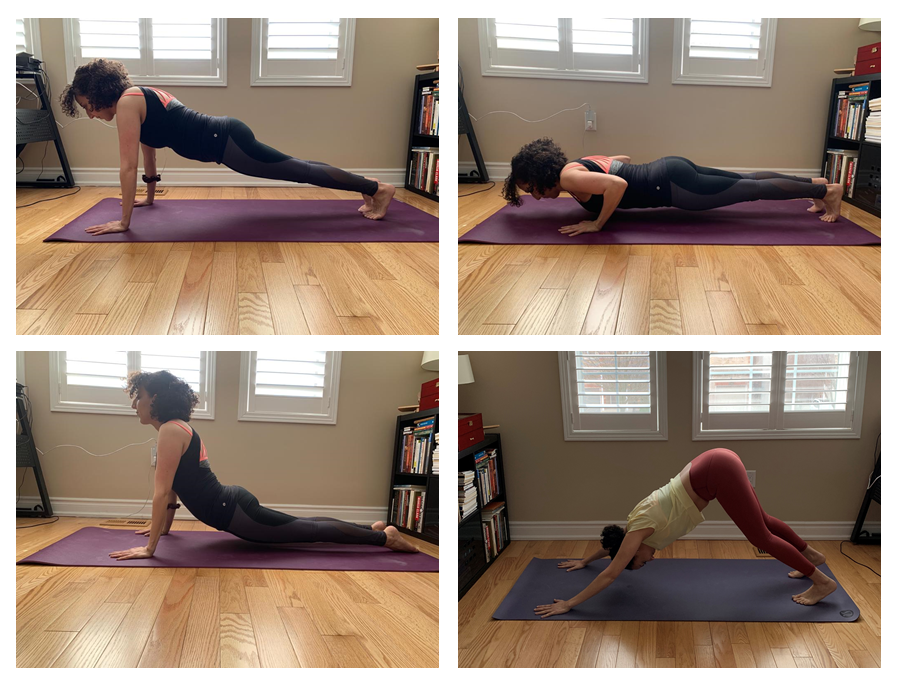
A typical Vinyasa Flow from Chaturanga to Down Dog
Therefore, great for those seeking a challenge, faster-pace, more variability, and wish to focus on strength!
3. Bikram Yoga
Developed by Bikram Choudhury in the 1970s, Bikram Yoga is a very specific practice that takes its poses from traditional hatha techniques:
Always 90 minute sessions
Always the same sequence of 26 poses
Always two breathing exercises
In a heated room of about 40C (or 105F)
In a carpeted room, with mirrors, and brighter lights
Bikram Yoga is meant to be more intensive:
Focuses on strength, flexibility, and aerobic practice
Does not usually adjust for the practitioner
Eagle Pose, one of the 26 asanas in Bikram Yoga
So, are Bikram and Hot Yoga the same thing?
Short answer, not quite.
Hot Yoga, is a derivative of Bikram Yoga, and as the name implies, it is also practised in a heated room:
Poses and sequences vary from the original Bikram Yoga to avoid trademark disputes and the controversies surrounding the founder
In a heated room of about 26-37C (or 80-100F)
Often in a dim, candlelit room with music playing
Adjusts for the practitioner’s needs
The heated room has several benefits:
Sweating a lot more, which is suggested to be good for both detoxification and calorie loss
Increased heart rate increases the aerobic challenge
The warmth loosens up the muscles and tissues, and is more comfortable for joint pain
Hot Yoga is usually practised at above 30C
For either one, make sure you bring water and a towel!!!
Therefore, best for those who like the heat and prefer to break a sweat during their workout!
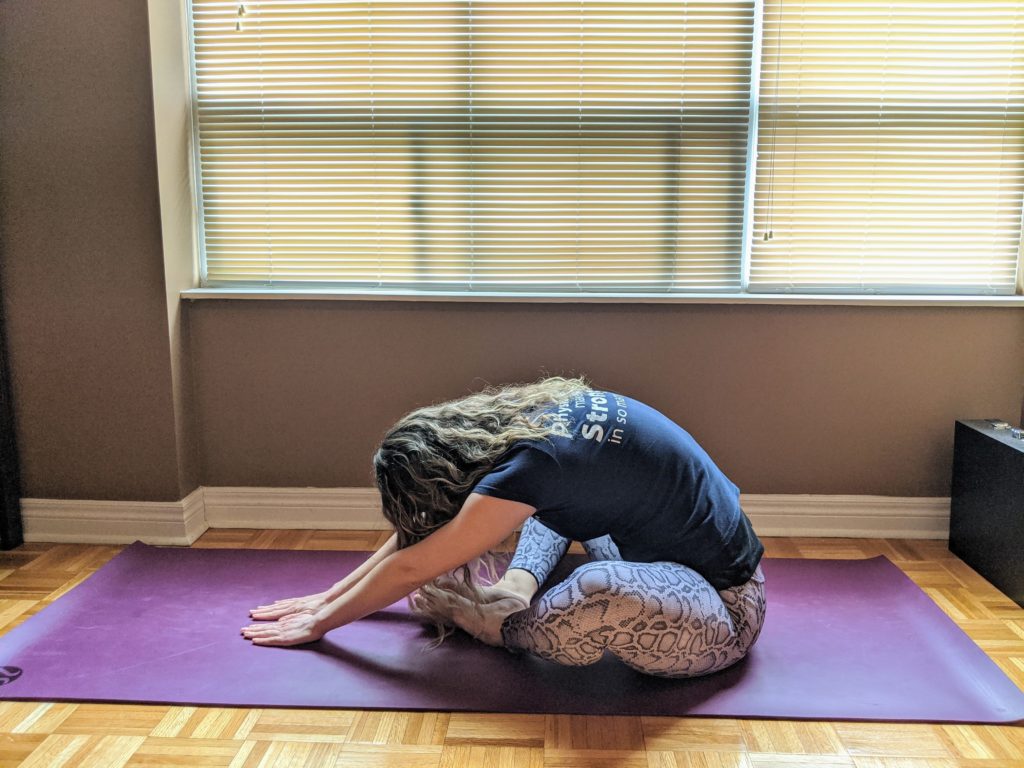
Focuses on winding down after a long day, relaxing the mind, and calming the nervous system
Minimal number of poses during a class, usually 5-6
Poses can be modified to be easier and more relaxing
Supports such as blankets, bolsters, and yoga blocks are used so you can relax further
Resting in each position comfortably for approximately 5-10 minutes
No yoga experience needed
Supported Child’s Pose in Restorative Yoga
Therefore, great for anyone who is looking to reduce anxiety and improve their sleep quality, or for anyone recovering from an injury or illness!
5. Yin Yoga
Yin Yoga was established in the late 1980s, based on the ancient Taoist concepts of “yin” and “yang”. The idea being that we often need to complement the Yang in our lives with a bit more Yin.
Yang represents more the masculine, active, fast-paced, and energetic aspects of our lives. On the other hand, Yin represents more feminine, passive, slow-paced, and calm energy.
There is a misconception that Yin and Restorative Yoga are the same thing. While both:
focus on passive positions (rather than the “Yang” poses of the more active Yoga styles)
are slow-paced
appropriate for any level of experience
calm the mind and nervous system
cultivate an aspect of meditation by increasing inner awareness and focusing on the breath
Yin Yoga specifically:
Works to release the deep connective tissues with challenging and slightly uncomfortable prolonged stretch positions (whereas Restorative poses are entirely about comfort and relaxation)
Increases and maintains flexibility by helping release the fascia
Lubricates the joints by improving circulation
The poses work into the meridians (or energy flows) of the body as per traditional Chinese Medicine
May or may not use supports during class, depending on the teacher
Butterfly Pose in Yin Yoga
Therefore, great for anyone looking to improve flexibility, or balance out an already strong Yang practice, such as Vinyasa!
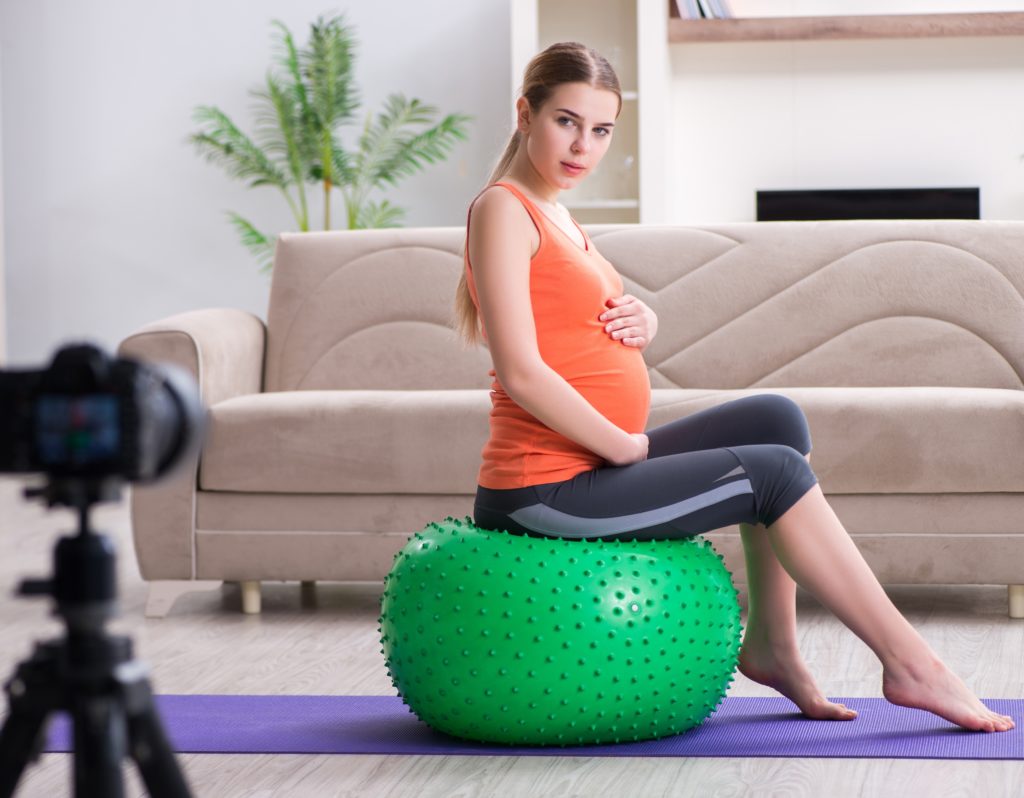
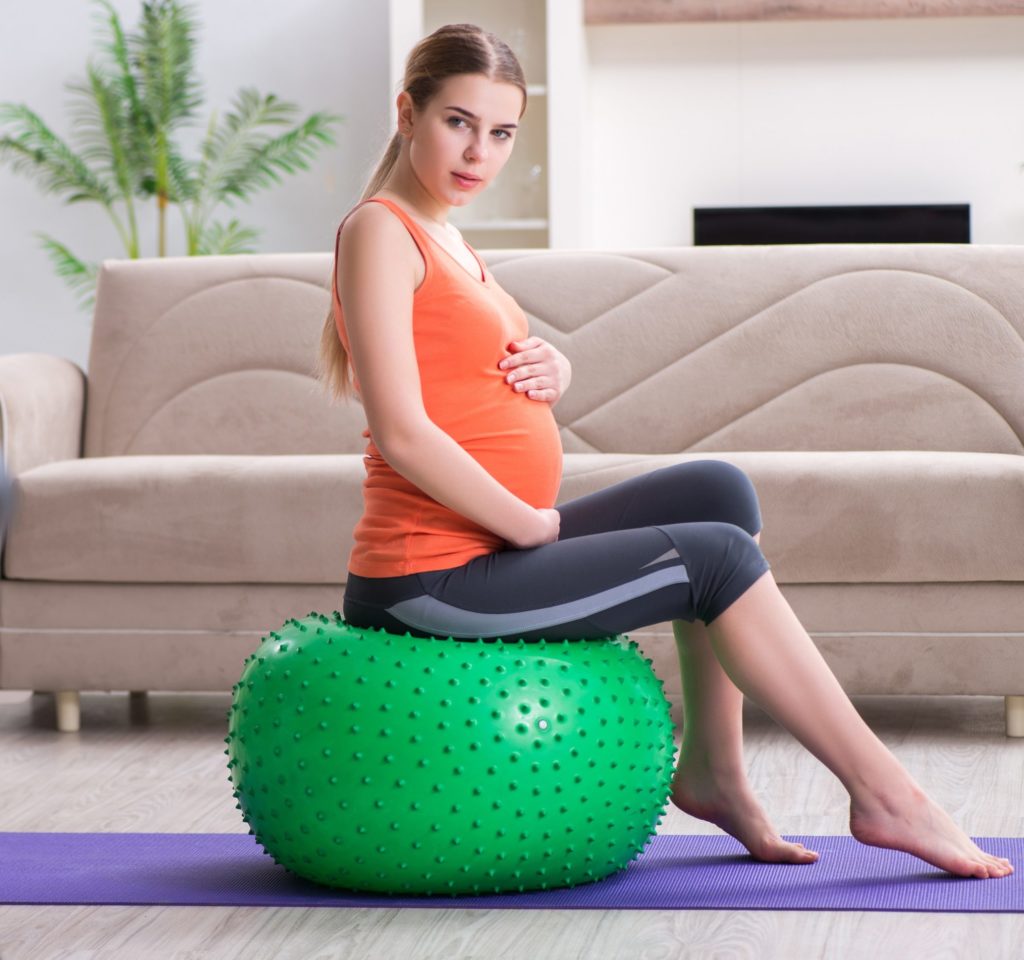
Bonus: Prenatal Yoga
Prenatal Yoga is adapted for pregnancy to avoid poses that would otherwise stress the joints. As long as your doctor has cleared you for physical activity during pregnancy, Prenatal Yoga is a great activity for expectant moms:
Usually focuses on pelvic floor and breathing exercises, meant to prepare for labour and delivery
The focus is more on stability rather than flexibility, as pregnancy hormones already loosen your ligaments, which can sometimes lead to joint pain
Gentle and relaxing, it may also help lower your blood pressure and stress, as well as help stabilize emotional ups and downs
Ask your yoga teacher for modifications as you go through the changes of the different trimesters and your center of gravity continues to shift.
For example, you may need to take more breaks as you feel more tired during the first trimester. Focusing on Cat-Cow rather than Downward Facing Dog may be helpful when experiencing morning sickness.
As you get your energy back in the second trimester, it might be best to focus on strengthening.
Relaxation and breathing techniques might be more beneficial as you near the end of your pregnancy.
If you are struggling with your Yoga practice, or recovering from an injury that is affecting your ability to engage in Yoga, we offer one-on-one Therapeutic Yoga sessions!Contact us for more information to find out how both our Physiotherapists and/or our Yoga Therapist can help!
Welcome back to Yoga Basics! Today we will demonstrate five of the most common Restorative Poses.
What are Restorative Poses you may ask?
There are many reasons to practice yoga… Some seek a challenge, looking for a yoga practice that feels more like a workout. Others think of yoga as a way to maintain mobility and flexibility.
Restorative Practice is for everyone. Sometimes you need to unwind… not everything has to make you sweat!
Here is a check list to see if you would benefit from some Restorative Practice:
Do you wake up tired and groggy?
Do you have a hard time falling asleep?
Are you recovering from an injury?
Are you more stressed, or on edge, than usual?
Do you struggle with anxiety?
Do you find it hard to shut off your brain?
Are you struggling with concentration?
Do you find yourself constantly checking your smartphone throughout the day, even while at work?
Then maybe you should give Restorative Yoga a try!
A class is usually 5-6 poses, often supported by yoga blocks and bolsters, so that you can relax into each stretch for 5-10 minutes.
If trying these Restorative Poses for the first time, start with 3 minute holds. You can set a timer to go off and then slowly come out of each position to the next…
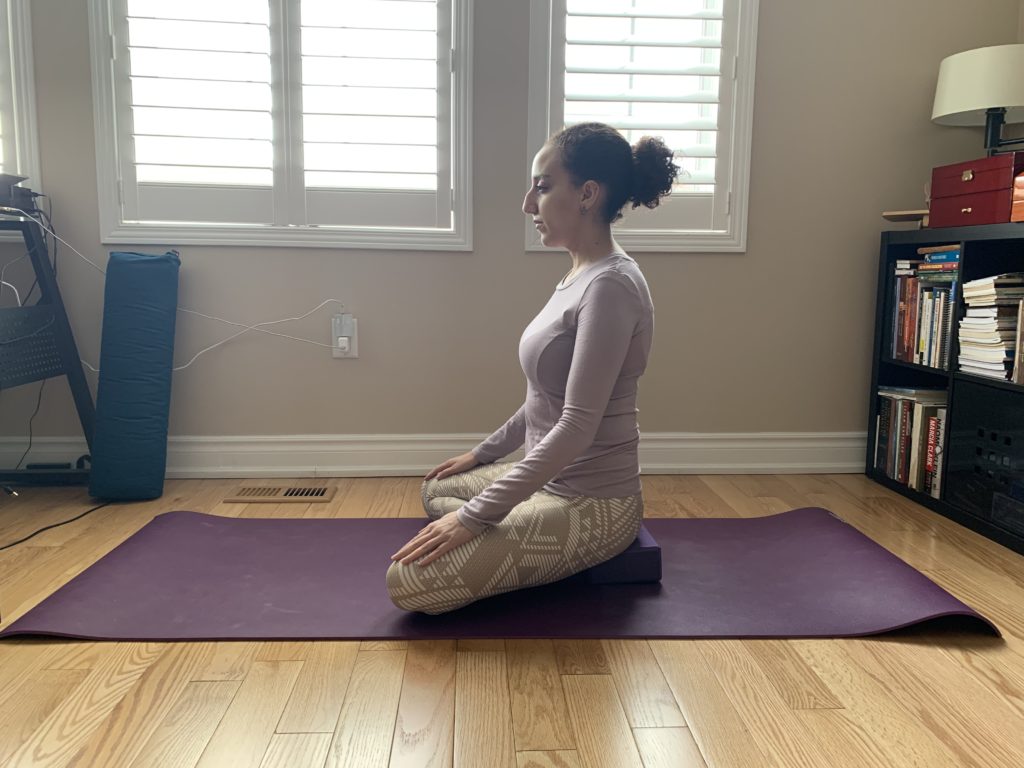
1. Sukhasana, Easy Sit Pose
While Restorative Yoga uses yoga blocks and bolsters to set up supports for most of the positions, you may not have all that at home. That’s okay. Blocks are meant to be smaller and more firm supports, while bolsters are larger, softer objects. You can use pillows and cushions in lieu of bolsters, and a mini step stool, or a big textbook, or a foam roller in lieu of a block.
Place a thickly folded blanket, or a horizontally-placed block, on the ground. Sit cross-legged on the floor, your sit bones on the support and your legs off of it.
Note: A higher support will be easier if you have issues with the knees, hips, or low back.
Place your hands on your knees, palms down.
Keep pelvis in a neutral position, so that your low back is not arched or slouched. (You may play around with some movement by arching your low back, opening up the chest, and gazing upward for a Seated Cow Pose. Then, slouching your whole spine and neck to bring chin down to chest for a Seated Cat Pose. Then, returning to a neutral pelvis position once again.)
Relax, close your eyes, and lengthen your breathing.
Depending on the length of time in this pose, it is good to alternate the cross of the legs.
Supported Easy Sit Pose
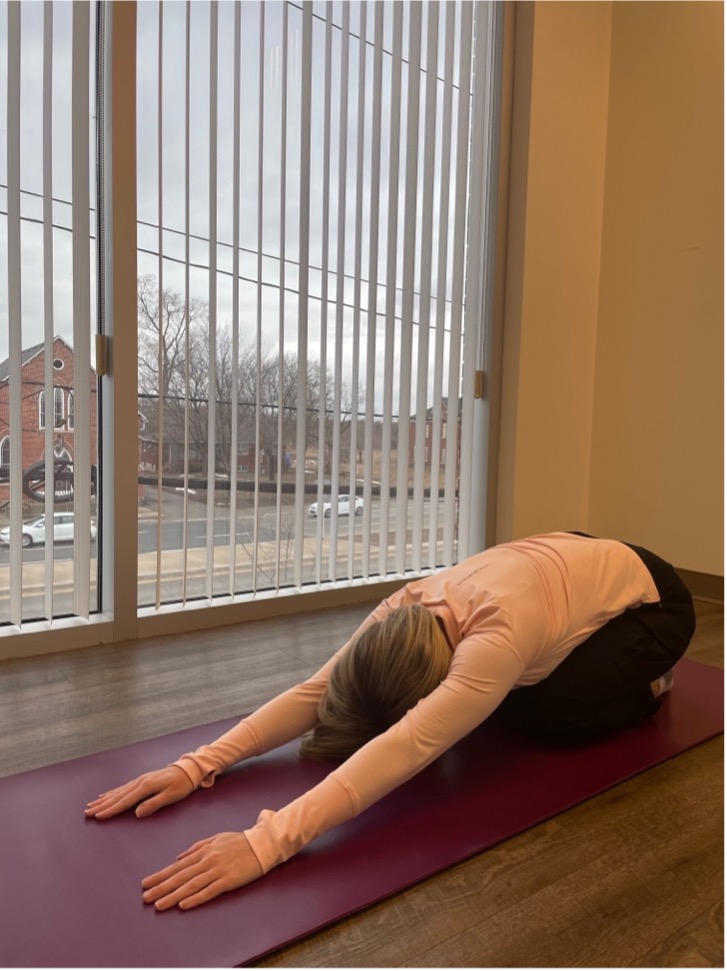
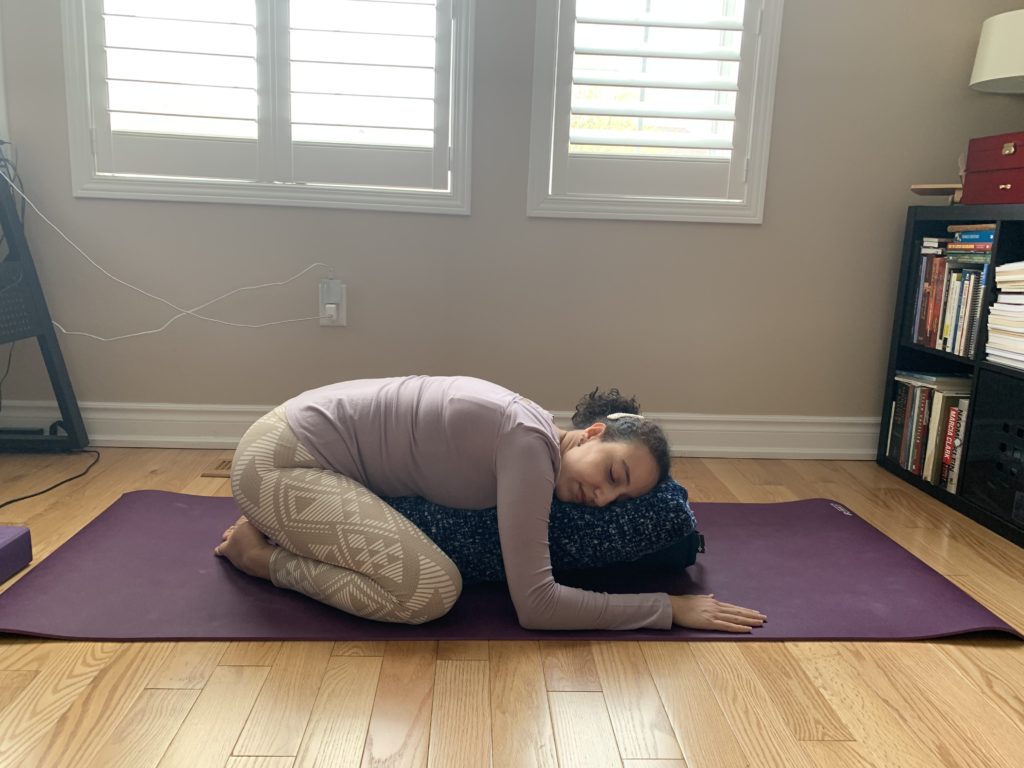
2. Balasana, Supported Child’s Pose
Position a bolster / pillow on an incline. Ideally, with two blocks: one midway underneath the bolster on its horizontal edge, and one underneath the far end of the bolster, on its vertical edge. If you cannot achieve a perfect incline, that’s okay.
Sit back on your calves in front of the lower end of the bolster. Your knees should be on either side of the bolster.
Then, lay your body onto the bolster, arms on the floor and palms down, relaxing. Your head will be turned to one side for half the time, and the other side for the other half. If you have neck pain turning to one side, then stay on the other side only.
Supported Child’s Pose
Note: if sitting back on your calves bothers your knees, you can substitute with Supported Wide-Legged Forward Fold Pose. Using the same support and your torso laid on top, have your legs extended out on each side of the bolster, the width between them based your comfort.
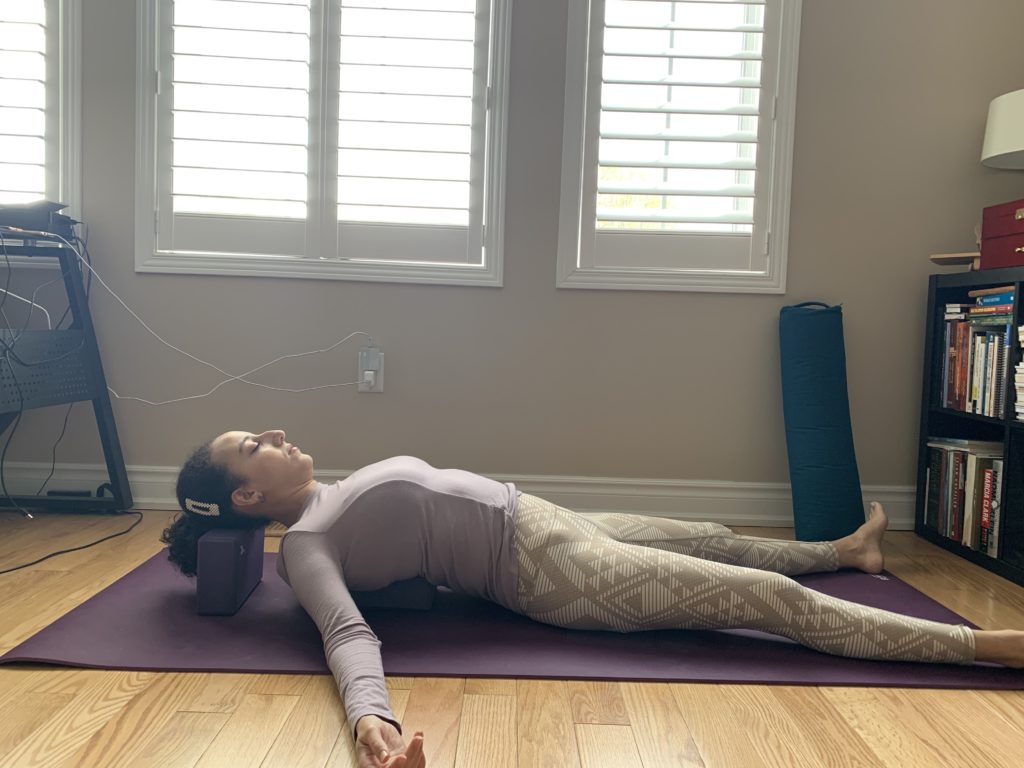
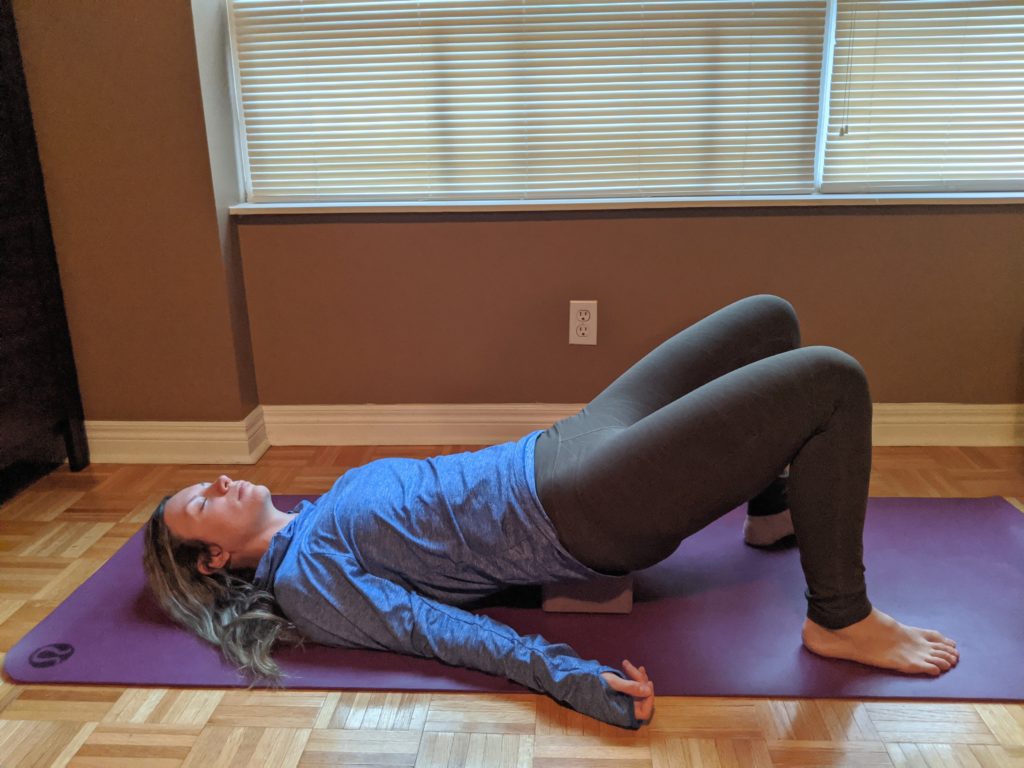
3. Matsyasana, Supported Fish Pose
While sitting with legs extended out in front of you, place a bolster or a long pillow behind you, touching your lower back. (Alternatively, you can use one vertical and one horizontal block as shown in the picture!)
Then, lay back your head and torso onto the bolster, your arms spread outward and palms facing up.
You can try this one with some, all, or none of the supports, based on what is most comfortable for you!
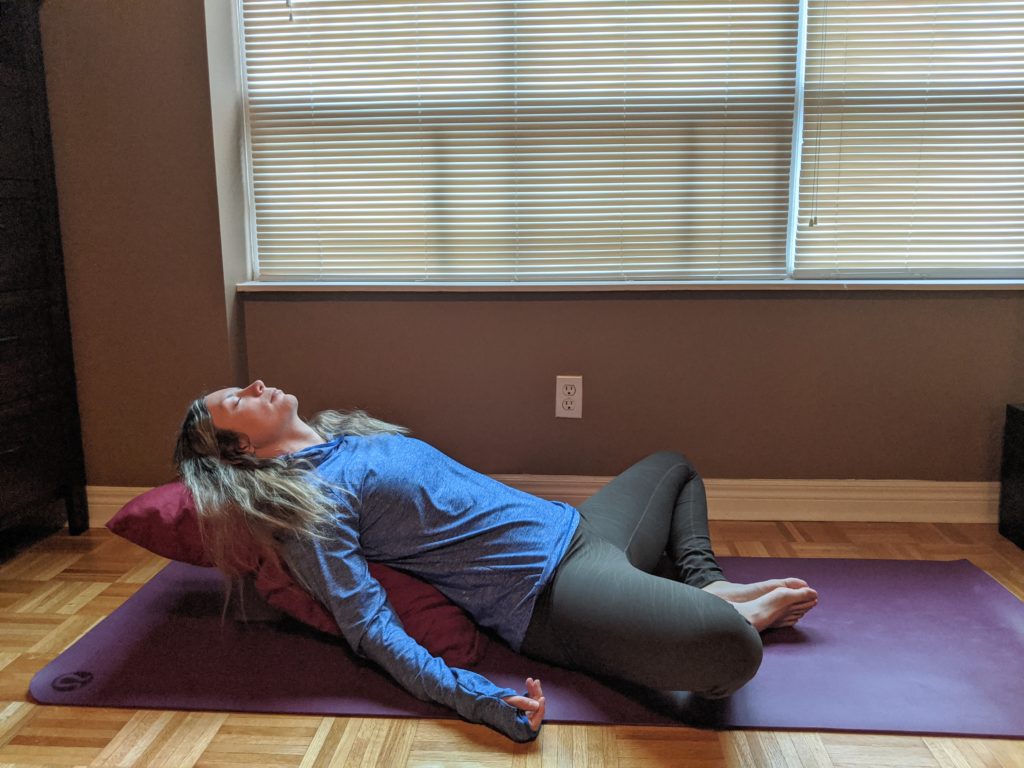
Use the same bolster set-up as with Child’s Pose, but create a steeper incline if able.
Sit with your low back to the lower end of the bolster. Then bend knees and bring the soles of the feet to touch, as the knees drop down on either side of you.
Lay back your head and torso onto the inclined bolster behind you.
You can place your left hand over your heart and the right just under the ribcage, or have the arms stretched out on the ground on either side of you, palms up.
Supported Reclining Bound Angle Pose
Note: If you have knee or groin pain, you can place blocks / bolsters underneath each knee so you are not overstretching and feel supported. Alternatively, when you initially bend your knees, do not bring the soles of the feet together or drop the knees to the sides. Instead, place a bolster directly underneath the knees and allow them them to comfortably rest on top.
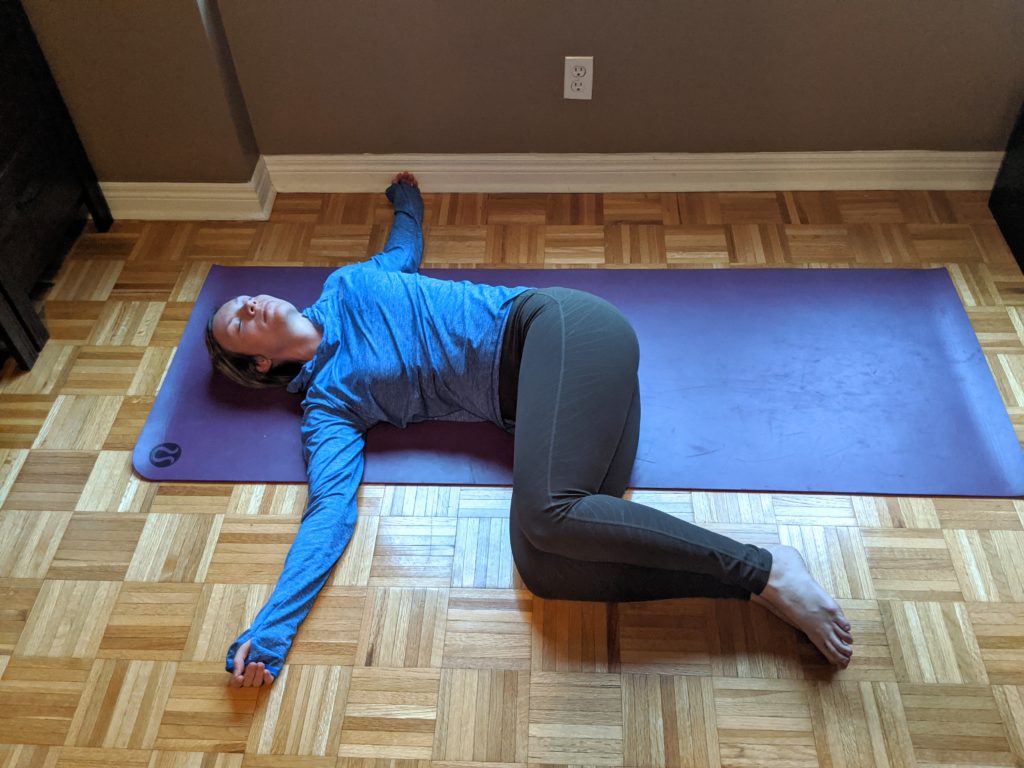
Most commonly known as Supine Twist (or Supine Spinal Twist Pose), you can either perform it with both legs at the same time, or one leg straight while the other goes over it.
Variation 1: lie on your back with knees bent and feet on ground.
On an inhale, spread out the arms at shoulder height and lay them on the ground, palms up.
On an exhale, drop the bent knees to the tight side so that the right outer knee is on the ground (and approximately level with the pelvis), and the left knee and hip are stacked directly over the right.
Ground down the left arm and shoulder blade as a counterbalance.
Revolve your abdomen back so that it is facing upward as much as possible.
Hold position for 2-3 minutes, then slowly return to start position, and repeat the same for the other side.
Supine Spine Twist Pose
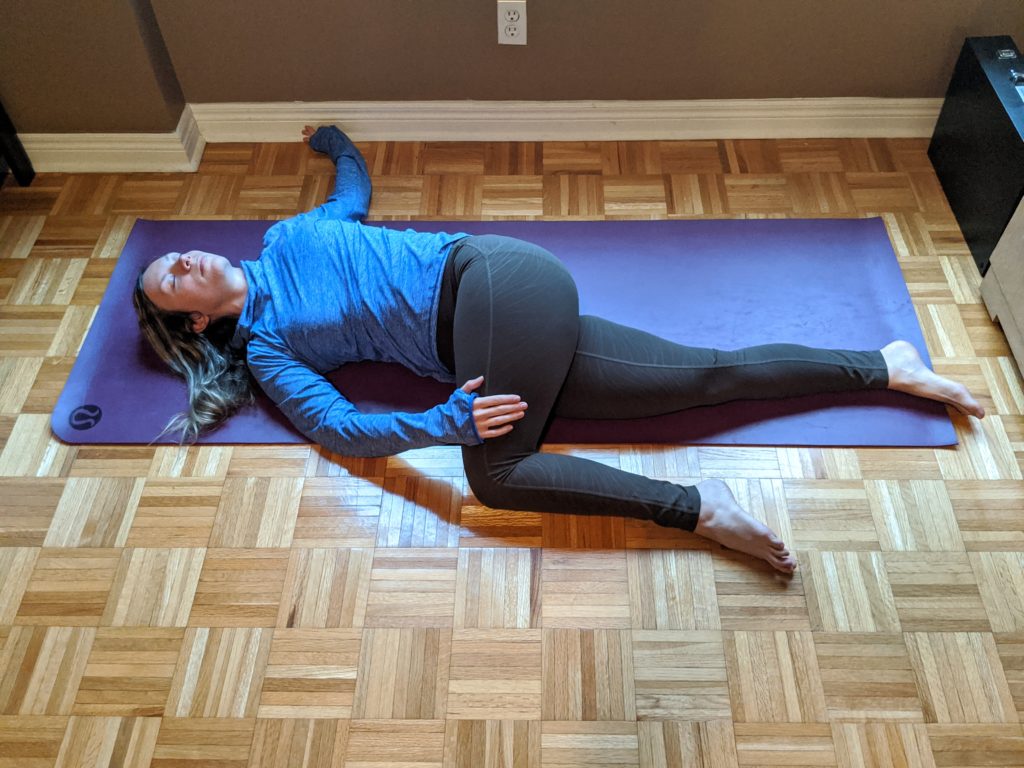
Variation 2: lie on your back with both legs straight. Bring left knee to your chest.
On an inhale, spread out the arms at shoulder height and lay them on the ground, palms up.
On an exhale, bring left knee over the right thigh and toward the ground. The left knee will be approximately level with the right hip and the left foot will also be on the ground, approximately level with the right knee. You can use your right arm to hold down on the left outer thigh and keep the leg in place, controlling the amount of stretch.
Ground down the left arm and shoulder blade as a counterbalance.
Hold position for 2-3 minutes, then slowly return to start position, and repeat the same for the other side.
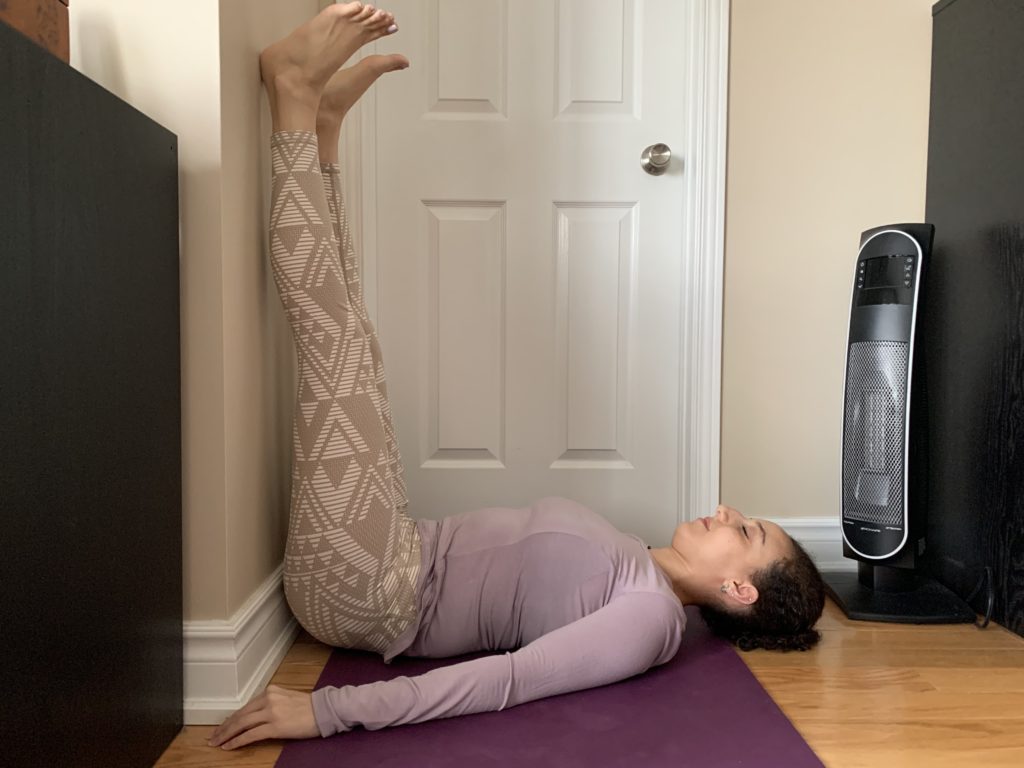
This pose is referred to as a “restorative inversion.” It is great for venous drainage and improving circulation, especially for swelling in the feet. Additionally, the position stretches the hamstrings, relaxes the pelvic floor, and may relieve some low back tension. Contrary to the name, it does not necessarily have to be done with legs against the wall.
Variation 1: Bring your mat or a blanket next to a wall at home. Then, getting close to the wall, lie on your back and place your feet onto the wall.
Scoot your hips as close to the wall as you are comfortable, then straighten out the knees, so that you for an “L” shape in this position.
You may place a cushion underneath your head or tailbone for increased comfort.
Spread your arms out about 45 degrees away from your body, palms up. Relax into the pose.
Note: if you are less flexible, use a lower cushion under the hips and tailbone and position yourself a bit further from the wall. If more flexible, you can use a higher cushion and get closer to the wall!
Legs-up-to-the-wall Pose
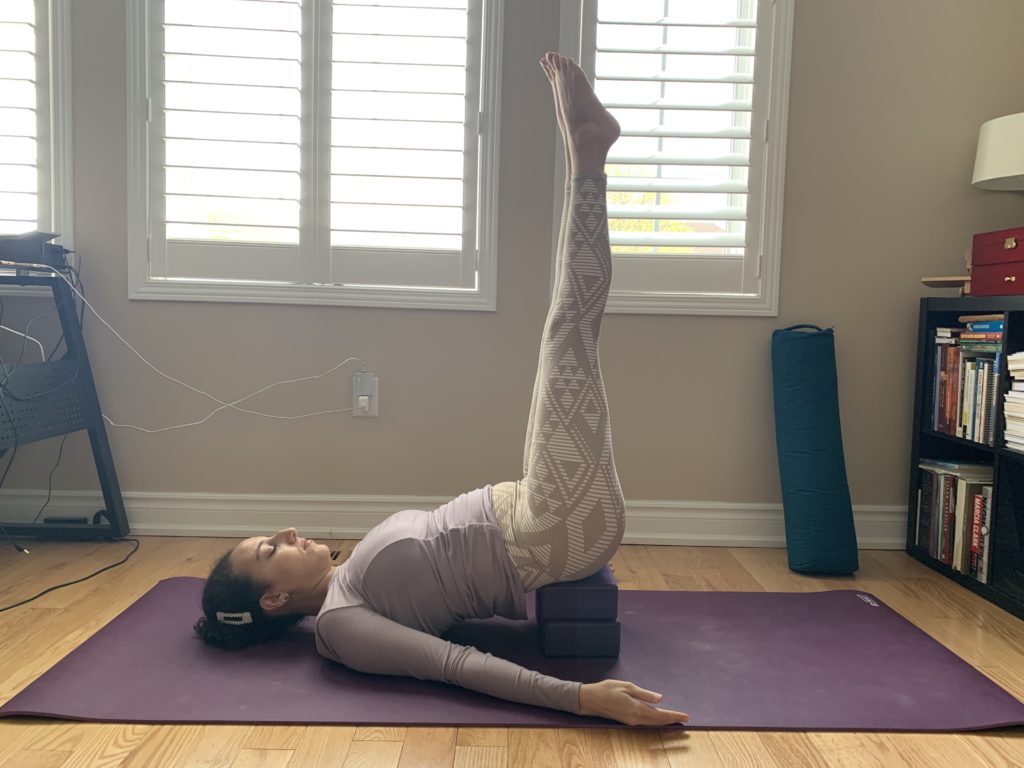
Variation 2:Waterfall Pose is an alternative position of Legs Up that does not require a wall!
Begin by laying down on your back with knees bent and feet on the ground.
Lift up the hips to slide a block (at its horizontal positioning) underneath the sacrum (the bony part just below the low back and just above the tailbone). You are now in a Supported Bridge Pose.
Bend one knee up toward you, then the other, with the block feeling like a comfortable support underneath.
Then, straighten out the knees so that the legs point up to the sky. If you have tight hamstrings, having the knees slightly bent to accommodate the tightness is okay.
Spread your arms out about 45 degrees away from your body, palms up.
Relax your breathing and enjoy the feeling the legs elevated!
Waterfall Pose
Note: if preferred, you can even stay in a Supported Bridge position, with the block underneath the sacrum, the knees bent, and the feet still on the ground (hips and knees hip-width apart)!
Supported Bridge Pose
Congratulations! You have completed a session of Restorative Yoga! Practice for a few weeks to reap the benefits, expanding the 3 minute holds to 5-10 minutes, and modifying your supports as needed. Remember, it’s not about perfection but rather what feels like a comfortable and restful position for you.
If you are having difficulty with these poses, or they are aggravating a pre-existing pain, let us know so we can help!
This series for anyone who is a beginner at yoga and would like to learn more about the individual poses so they can build the foundation for their practice…
Today we will talk about yoga poses that focus on building your core strength (check out Part 2 for some Common Poses that are used as starters in today’s post). If you are new to yoga and thought it’s all about stretching, guess again!
These core poses will definitely challenge you, but that’s okay! You don’t have to be super flexible and you don’t have to be super strong to start because it’s through a regular practice that you improve 😊
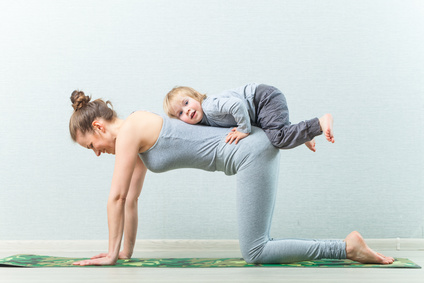
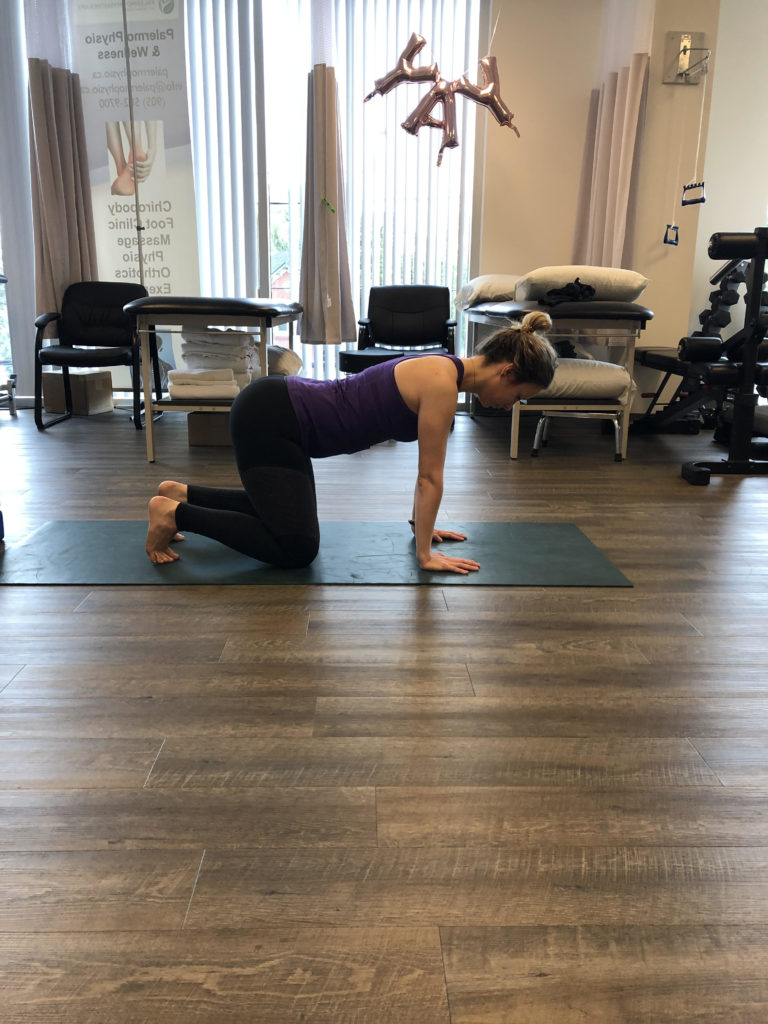
1. Dandayamana Bharmanasana, Balancing Table Pose
Balancing Table Pose, also dubbed the Bird-Dog, works your core, glutes, and back stabilizer muscles.
Start in Table Top, hands under shoulders and knees under hips (and placed hip-width apart)
Table-Top Pose
The whole spine is parallel to the ground, head is in line with the body, and the gaze is toward the ground as well
Gently pull belly-button in 2 inches toward the spine
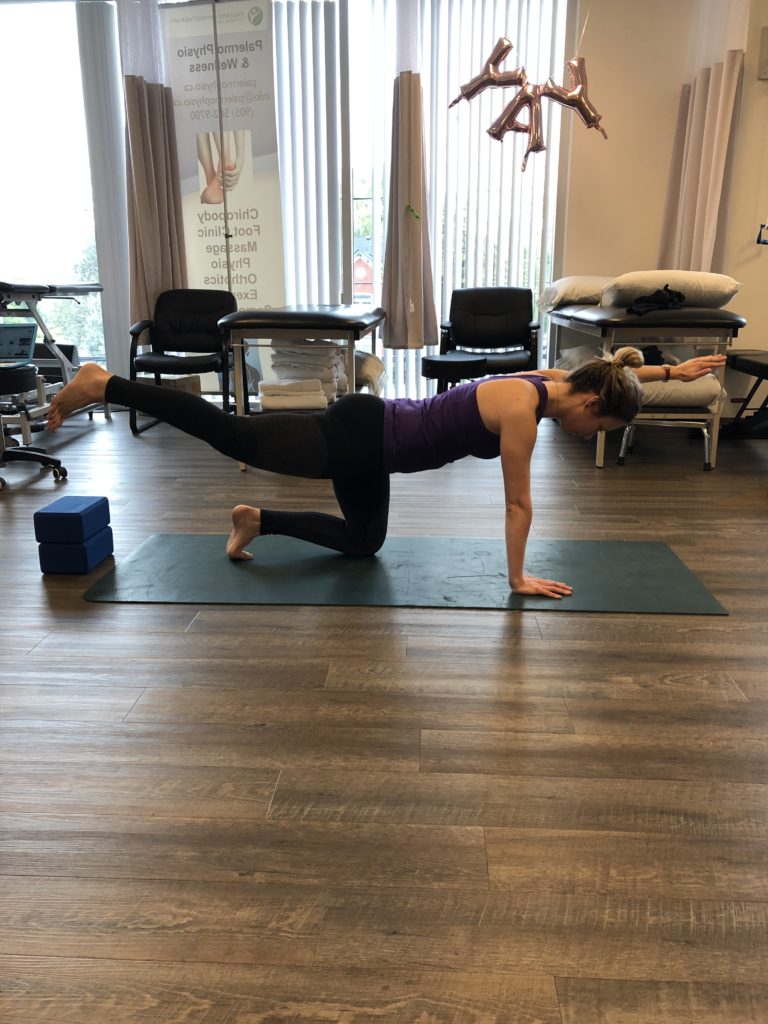
Then, on an inhale, reach one arm forward so that it is parallel with the ground
Then, without arching the low back or tilting the pelvis, straighten out the opposite leg so that it is parallel to the ground and in line with the torso
Bird-Dog Pose
Hold position for 5 breaths, continuing to pull the belly-button inward. Then, slowly lower arm and leg down while keeping the whole torso in a neutral position. Repeat on opposite side. If you find having both arm and leg up is too challenging for the balance, perform only with the arm, or only with the leg, alternating between both sides.
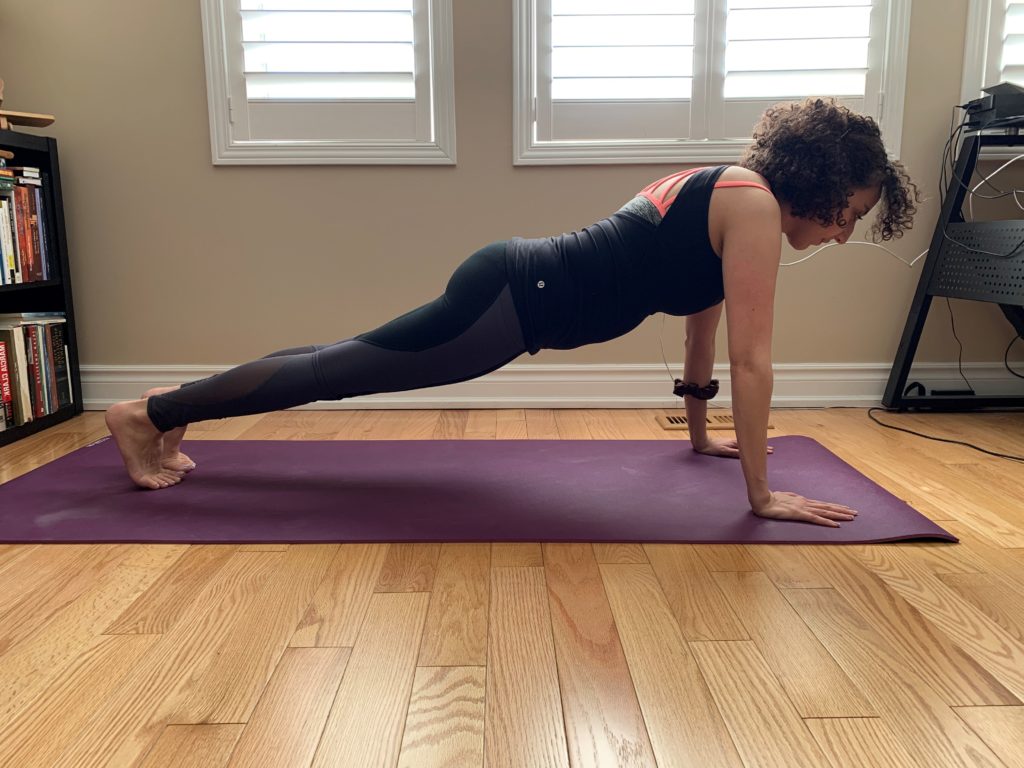
2. Kumbhakasana (AKA Phalakasana), High Plank Pose
High plank is a great core exercise but it does put a lot of weight-bearing through the wrists and shoulders. If this is uncomfortable, try it on your forearms instead (Dolphin Plank). In Dolphin Plank, keep the elbows under the shoulders. You also have the option of either a straight torso, or hips higher in the air to make holding the pose easier.
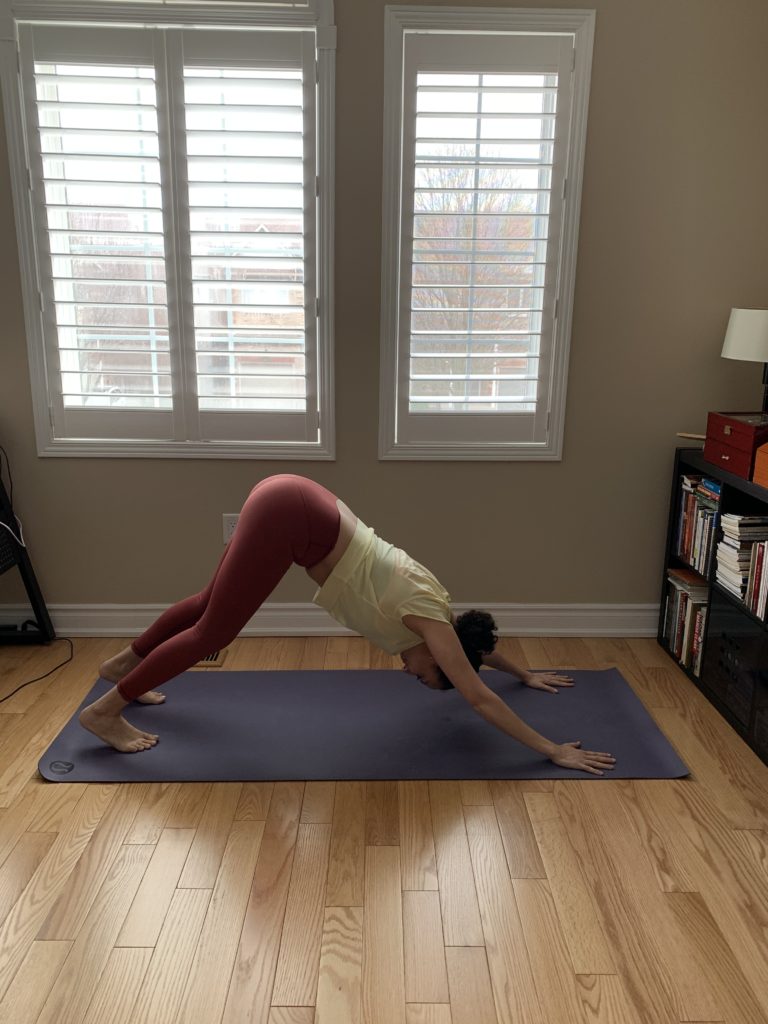
Start in Downward Facing Dog (described in Part 2!) and on an inhale, lower your hips as you shift your torso forward
Downward Facing Dog Pose
In this way, your arms should become perpendicular to the ground and your shoulders position directly over your wrists
If needed, you can slide the toes farther back
Your whole spine should make a straight line and turn your gaze toward the floor, without letting the head hang down
Gently pull the belly button in 2 inches toward the spine in order to engage the core
If feeling wrist discomfort, press more into thumbs and index fingers
High Plank Pose
Hold position for 30 seconds, or 5 breaths. Then, bring knees down to come into Table Top to rest. Repeat 3-5 times.
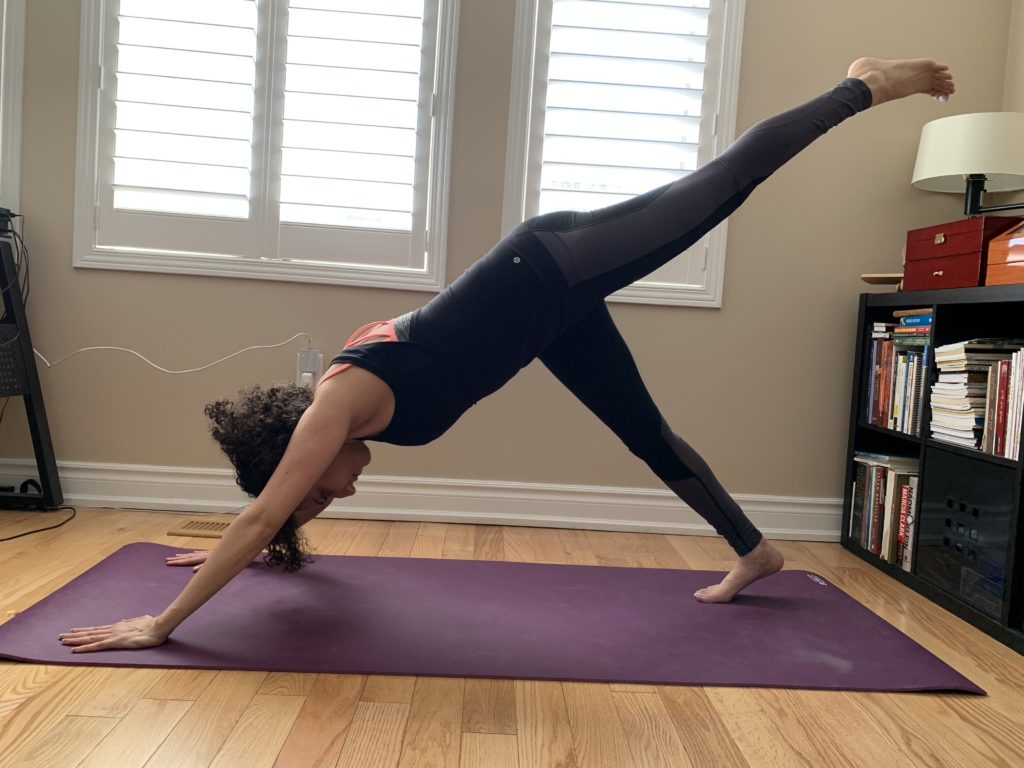
This pose is a more advanced variation of the plank and can flow as a sequence from the Three-Legged-Downward-Facing-Dog (AKA One-Legged-Downward-Facing-Dog), or can simply be done from a High Plank position. We will describe the flow sequence in order to challenge your balance further and begin to get you more comfortable with the flow of regular practice.
Start in Downward Facing Dog and then extend the right leg up into the air, foot flexed so that the heel points toward the wall behind you
Keep the pelvis square to the floor, do not let it twist or dip with the leg raise
As you are now on “three legs” now (Three-Legged-Downward-Facing-Dog), your balance will be challenged by the asymmetry of the pose
Three-Legged Downward Facing Dog Pose
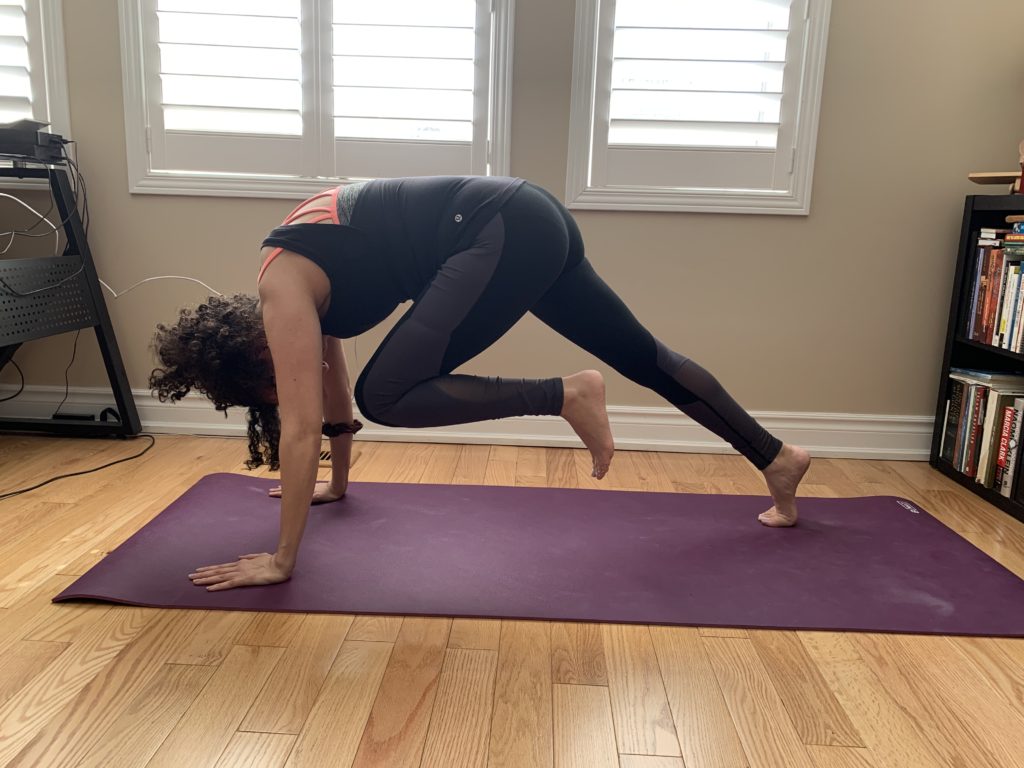
From here, on inhale, shift torso forward as you lower the pelvis and bring the right knee toward the right elbow
Pull belly button in two inches toward the spine to engage the core and stay in this position for 1-3 breaths
Knee-to-elbow Plank Pose
On an exhale, return to Three-Legged-Downward-Facing-Dog
Lower right leg down, and repeat with left
For further challenge, bring knee to opposite elbow, thereby adding a twist to the Knee-to-Elbow Plank.
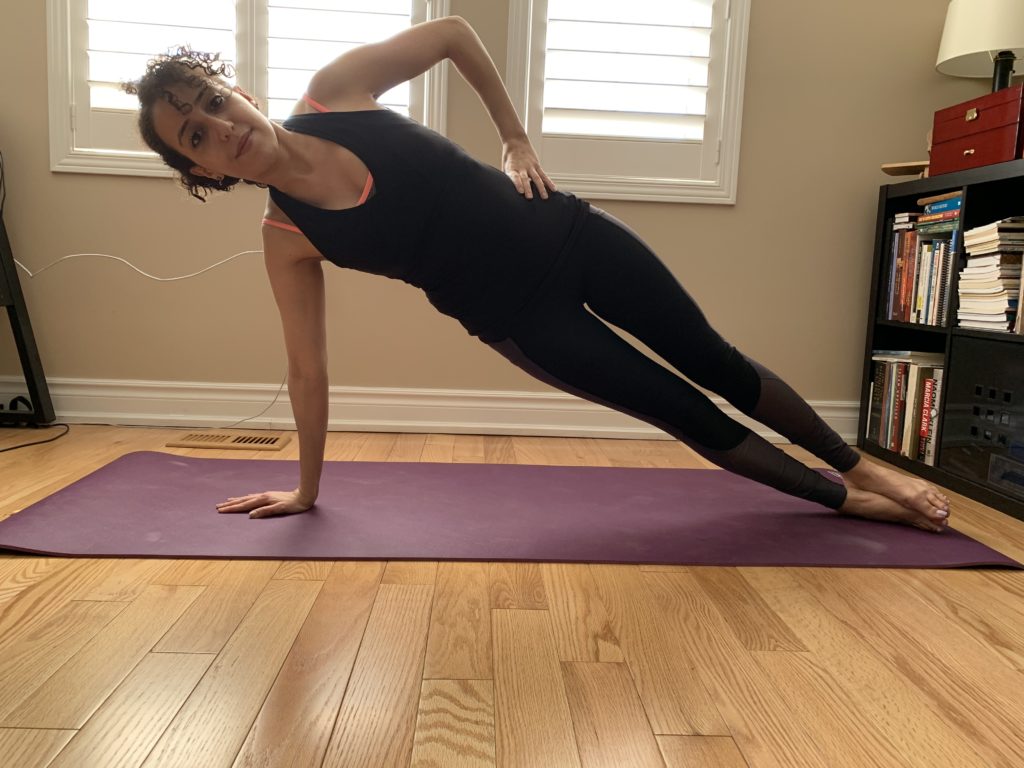
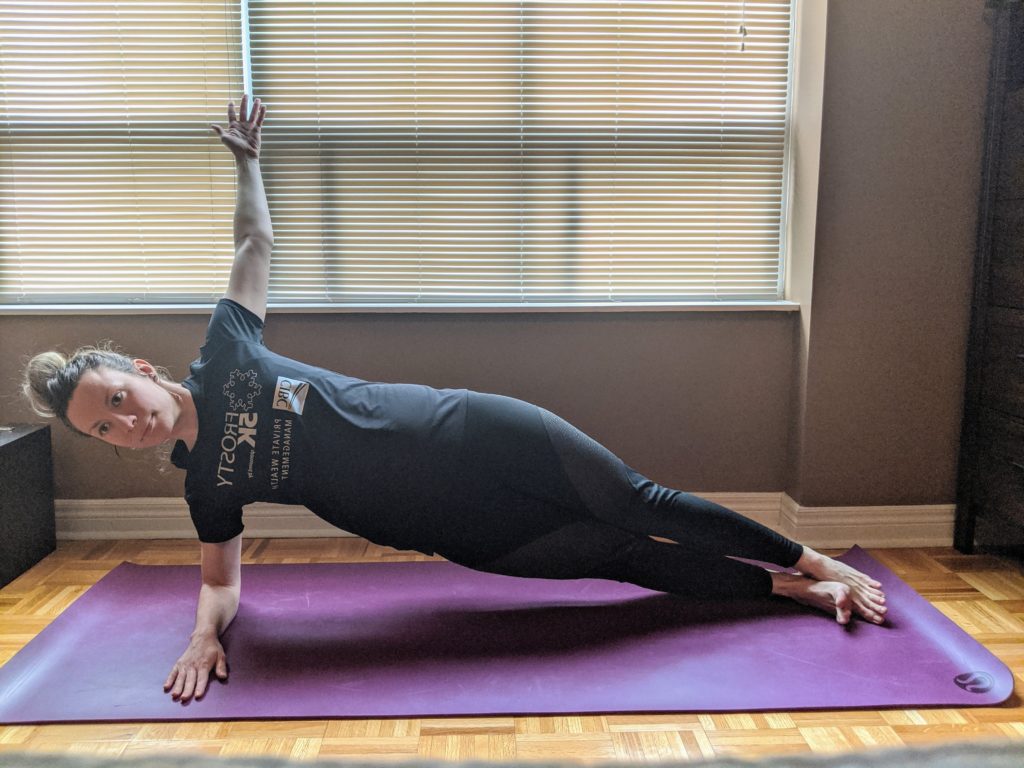
4. Vasisthasana, Side Plank Pose
Side Planks are a great core exercise that works your balance and concentration. Additionally, they are a weight-bearing exercise that strengthens wrists, forearms, and shoulders. If you have wrist or shoulder pain, or find the straight arm position too challenging, try this position on your forearm instead!
Start in either High Plank or Dolphin Plank (forearm plank)
Twist your lower body (pelvis and legs) to face to the left, and place left foot on top of right (or in a staggered position, just in front of it)
Putting your body weight through the right arm, slowly turn the torso to face to the left as well, extending the left arm up toward the ceiling. If extending the arm to the ceiling is too challenging, your can place it on your left hip instead.
Pull belly button in two inches toward your spine to engage the core
Make sure your hips are stacked one on top of the other; your body should form one straight line from the feet all the way to the crown of your head
If you started from High Plank, the supporting hand should not be directly under the shoulder but slightly in front of it. Press through the base of your thumb and index finger.
High Side Plank Pose
If you started from Dolphin Plank, the forearm should be adjusted to be perpendicular to the body
Keep your head neutral and gaze forward, or if able turn to look up toward the left hand as it reaches for the ceiling
Low Side Plank Pose
Hold position for 10 seconds while continuing to engage the core and take gentle breaths. When ready, return to High Plank (or even Table Top) to rest. Repeat 3 repetitions on each side.
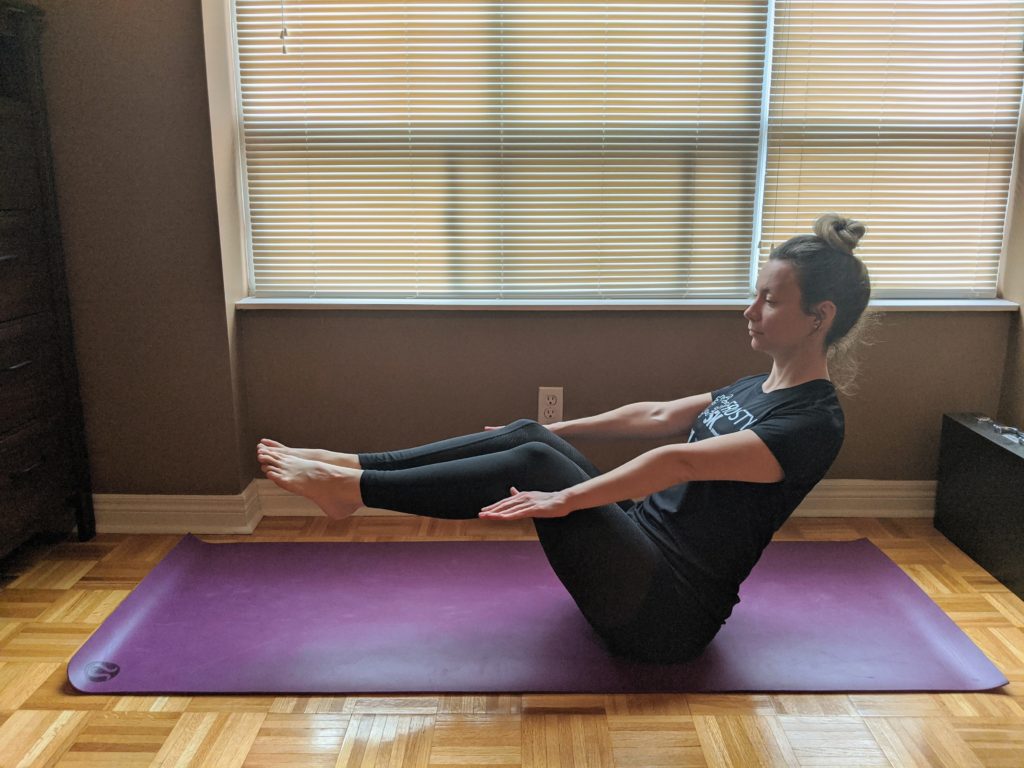
5. Paripurna Navasana, Boat Pose
This pose works both your abs and hip flexors!
Begin seated with legs straight out in front of you
Place hands on the floor slightly behind the hips and press down
Lean torso slightly back, keeping chest open and low back straight
You should now be sitting more on the sit bones and tailbone area
On an exhale, bend the knees and then lift the feet off the ground
Gently pull the belly button in 2 inches toward the spine to engage the core and keep the low back straight
If able, straighten out the knees. In this way, you’re creating a V shape with your body! If not able, keep knees bent and shins parallel with the ground.
Lift arms in front of you so that they are alongside the legs and parallel to the ground. If not able, keep the hands on the floor, or lightly hold on to the backs of the thighs for stability.
Boat Pose
Hold position for 10-15 seconds, gently breathing throughout that time. Repeat 3-5x. Gradually increase the hold time as per your tolerance. Always keep the low back straight!
Bonus Sequence:
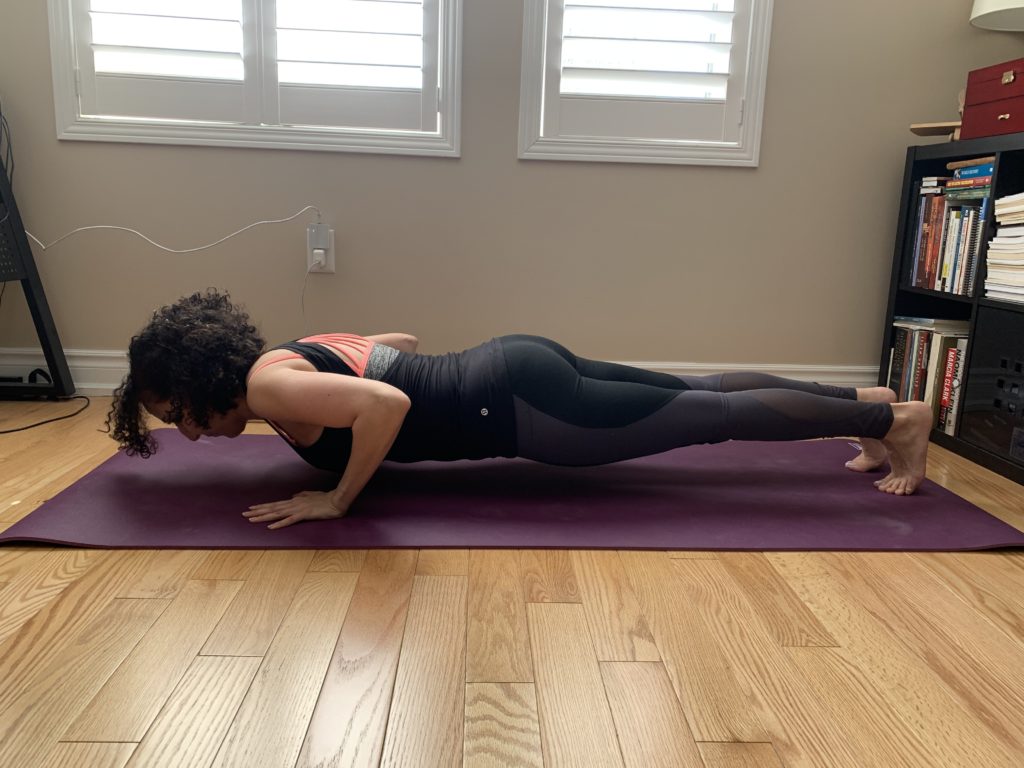
It’s time for another flow sequence! The main challenge here is the Chaturanga Dandasana, (Four-Limbed Staff Pose).
Start from Downward-Facing-Dog
On an inhale, shift forward to High Plank and pull the belly button in 2 inches toward the spine
On an exhale, slowly lower your body to a few inches above the ground by bending your elbows to 90 degrees (or as close as you are able)
Try to keep your body as parallel to the ground as possible. Aim to have your upper arms in line with your torso and your forearms perpendicular to the ground.
Chaturanga, or Four-Limbed Staff Pose
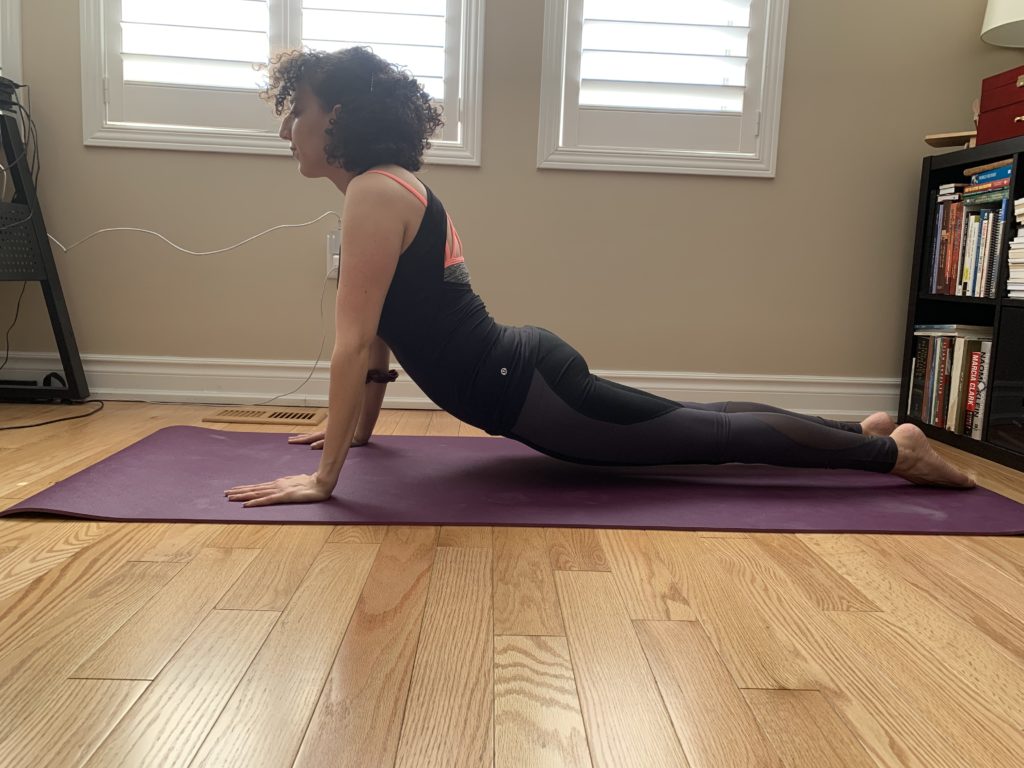
On an inhale, straighten out the arms again as you lift up the chest and gaze toward the sky. Going into Upward-Facing-Dog, stay propped up on your toes, knees + thighs + pelvis still hovering above the ground. If this is too challenging, go into Cobra Pose instead (knees + thighs + pelvis can all rest on the ground).
Upward Facing Dog Pose
On an exhale, engage the core and pull your hips up toward the sky to return to Downward-Facing-Dog
Congratulations, you have completed the bonus challenge! If you struggled with any of the above positions, that is okay. Start wherever you are able and gradually progress from there!
If you are experiencing pain or difficulty with range of motion while attempting these poses, or have specific goals you are working toward, or would just like some more guidance with your practice, let us know!